
How to Carve a Turkey Breast Like a Pro

Learning how to carve a turkey breast doesn’t have to be the most stressful part of your holiday meal. Whether you’re working with a whole bird or just the breast, mastering the technique will leave you with beautifully sliced meat that looks restaurant-quality. Ready in about 15-20 minutes with the right tools and technique, you’ll wonder why you ever worried about this step.
Save This Post!
Once you’ve got the carving down, you can use that perfectly sliced turkey in countless ways. From muffin tin turkey and stuffing cups to homemade hot pockets, your carved turkey will be the star of many meals to come.
Reasons You’ll Love These Tips
- Professional Results: These techniques will help you achieve clean, even slices that look like they came from a professional kitchen, impressing your guests every time.
- Less Waste: Proper carving methods ensure you get the maximum amount of usable meat from your bird, making the most of your investment and reducing food waste.
- Easier Than You Think: Once you understand the basic anatomy and follow a few simple steps, carving becomes second nature rather than a dreaded task.
- Versatile Skills: Whether you’re working with a bone-in breast, boneless breast, or whole turkey, these techniques adapt to any situation you’ll face.
Essential Tools for Carving Turkey
Before you start carving, make sure you have the right equipment. A sharp carving knife with a long, thin blade is your most important tool. You’ll also want a sturdy cutting board with a groove to catch juices, a carving fork to stabilize the meat, and a platter for your beautiful slices.
Don’t underestimate the importance of a sharp knife. A dull blade is not only frustrating but also dangerous since it requires more pressure and can slip. If your knife doesn’t glide through a ripe tomato with ease, it’s time to sharpen it before tackling your turkey.
How to Remove the Breast from a Whole Turkey
Starting with a whole turkey? Removing the breast first makes everything easier. Let your cooked turkey rest for at least 20-30 minutes after it comes out of the oven—this allows the juices to redistribute and makes carving much cleaner.
Position the turkey breast-side up on your cutting board. Locate the breastbone running down the center of the bird. Using your carving knife, make a long cut along one side of the breastbone, following the natural curve of the bone. Keep your knife close to the bone as you work your way down, using smooth, long strokes rather than sawing motions.
As you cut deeper, you’ll feel the ribcage beneath your knife. Continue following the contour of the ribs, gently pulling the breast meat away from the carcass with your free hand. Once you reach the wing joint, cut through it to completely separate the breast. Repeat this process on the other side, and you’ll have two beautiful, intact turkey breasts ready to slice.
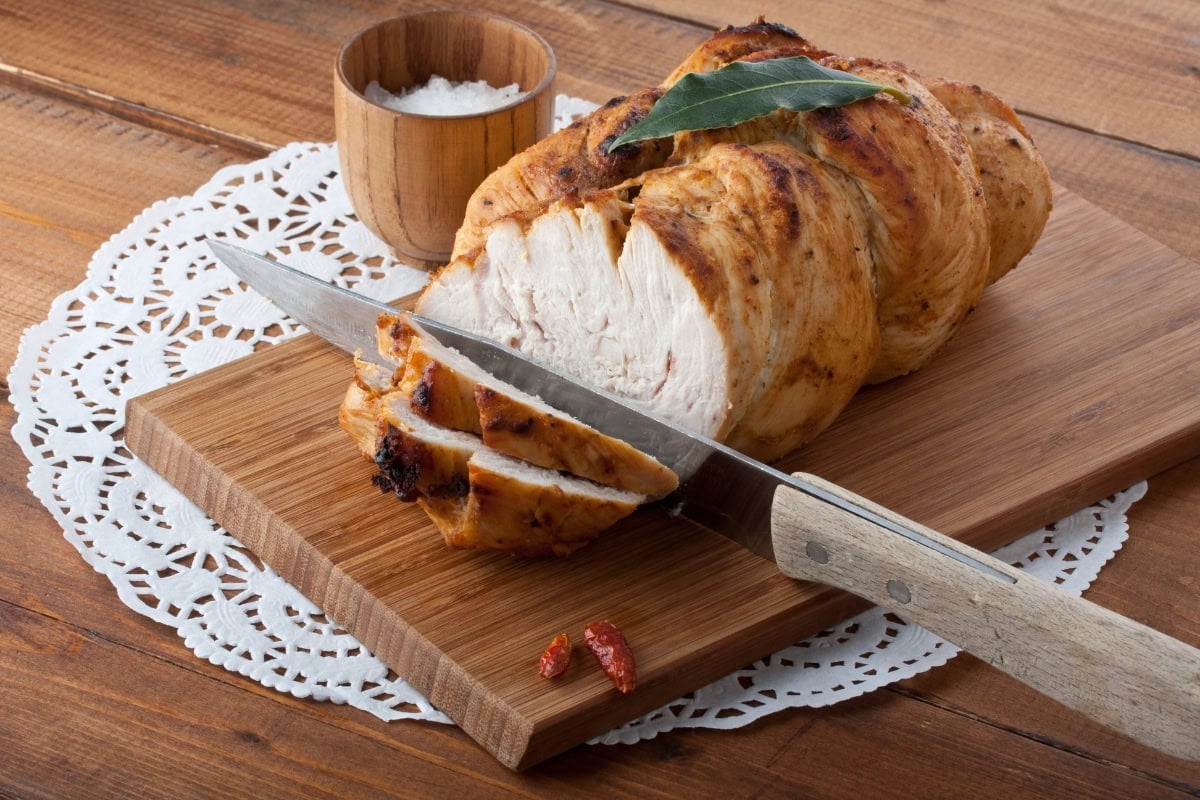
How to Carve a Turkey Breast
Whether you’ve just removed the breast from a whole bird or you’re working with a standalone turkey breast, the slicing technique remains the same. Place the breast skin-side up on your cutting board. If it still has the skin on, you can leave it attached or remove it depending on your preference.
Position your knife perpendicular to the cutting board and slice across the grain of the meat. The key here is “across the grain”—look at the direction the muscle fibers run and cut perpendicular to them. This shortens the fibers and makes each bite more tender.
Aim for slices about 1/4 to 1/2 inch thick. Thinner slices tend to dry out, while thicker ones can be tough to eat. Use smooth, confident strokes and let the sharp knife do the work. As you slice, fan the pieces out on your serving platter for an attractive presentation.
If you’re working with a particularly large breast, you may want to cut it in half lengthwise first, then slice each half. This gives you more control and makes it easier to get uniform slices.
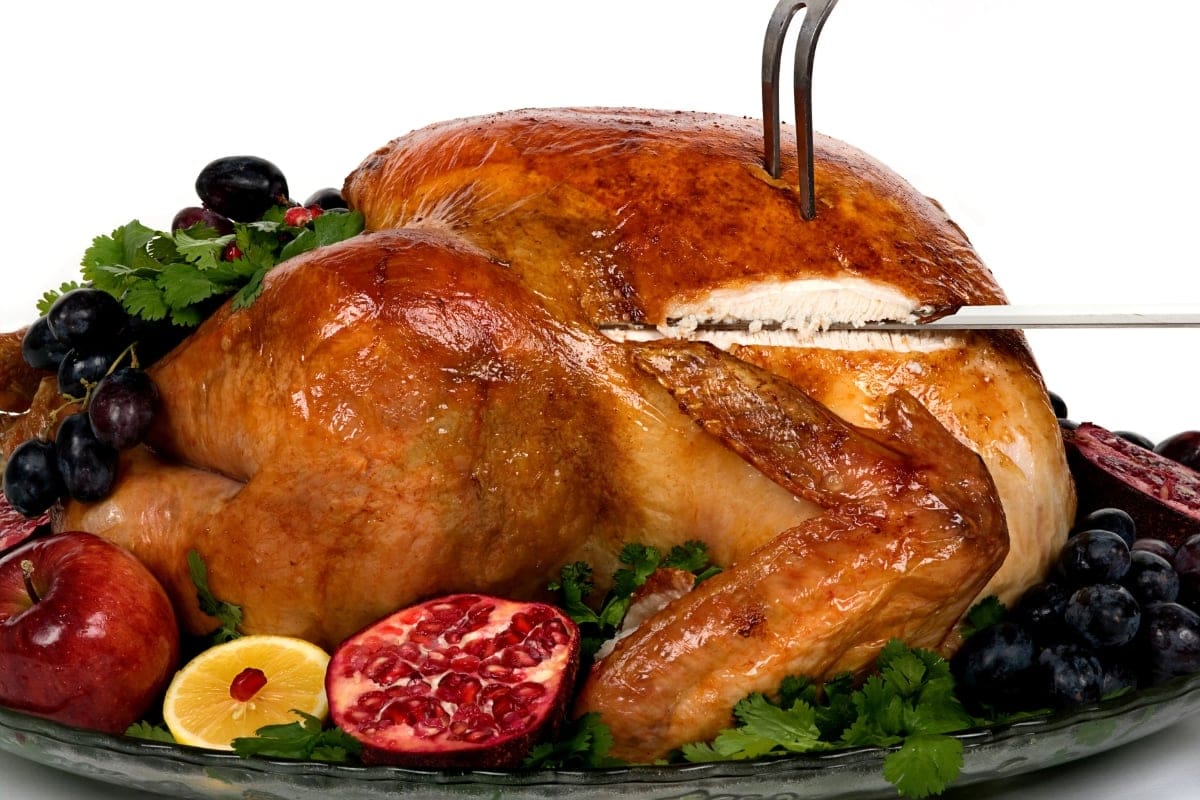
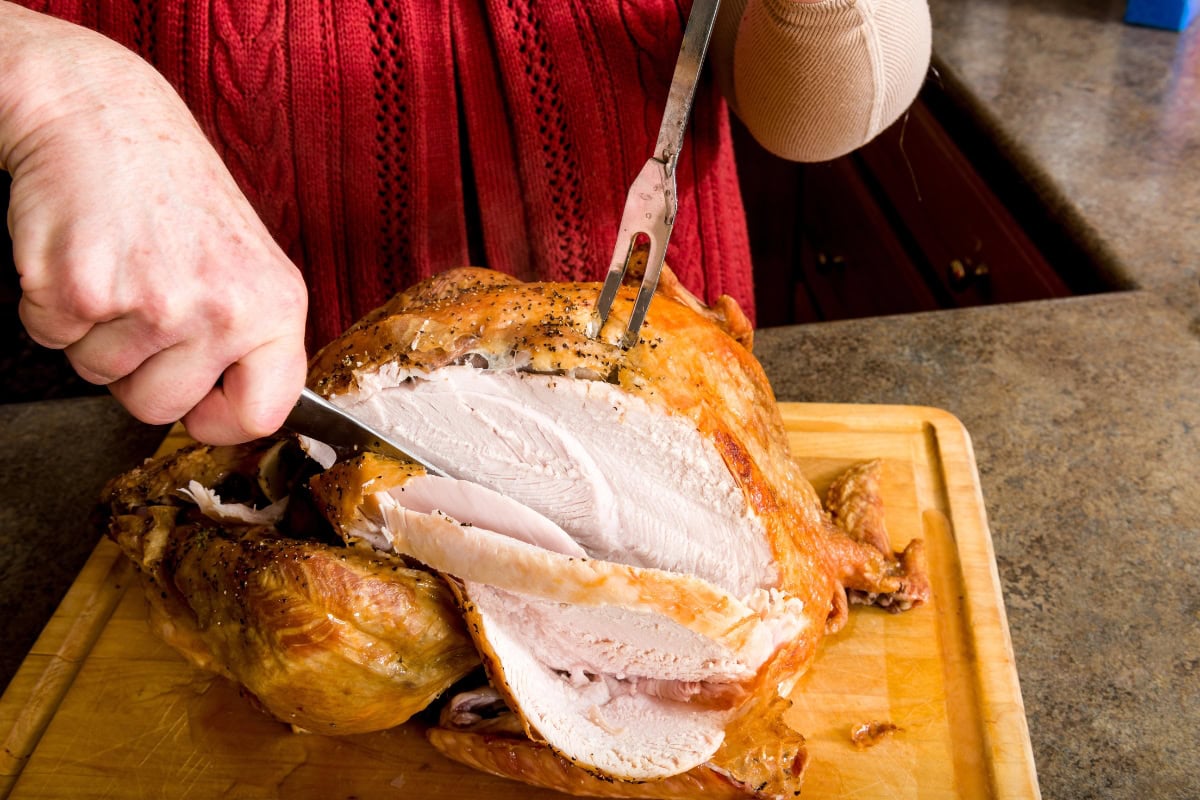
How to Carve a Whole Turkey
Carving an entire turkey at the table can feel intimidating, but breaking it down into steps makes the process manageable. After your turkey has rested properly (this is crucial—don’t skip it!), you’ll want to start with the legs and thighs before moving to the breast.
Begin by pulling one leg away from the body and cutting through the skin connecting it to the breast. Continue cutting down until you hit the joint where the thigh meets the body. Pop the joint out of its socket and cut through it to remove the entire leg. Separate the drumstick from the thigh at their joint. Slice the thigh meat off the bone or serve it whole if your guests prefer dark meat.
Next, remove the wings by cutting through the joint where they meet the breast. These can be served whole or you can remove the meat for those who want it.
Now tackle the breast using the method described earlier—cut along both sides of the breastbone and remove each breast half. Slice the breast meat crosswise and arrange it on your platter. Check out the turkey cooking tips guide for perfect cooking times before you get to the carving stage.
Pro Tips for Perfect Turkey Carving
Temperature matters more than you might think. Cold meat is harder to carve cleanly, so if you’re carving leftovers, let them come closer to room temperature first. However, the turkey should still be at a safe temperature for serving.
Keep a damp kitchen towel nearby to wipe your knife blade between cuts. This removes bits of meat and fat that can make your blade slip. It also keeps your slices looking clean and professional.
Don’t rush. Take your time with each cut, especially when working near bones. Rushing leads to ragged slices and wasted meat. Remember, your guests can wait a few extra minutes for beautifully carved turkey.
Save that carcass! After you’ve removed all the meat, the bones make incredible turkey stock. Just toss them in a pot with some vegetables and water, and you’ll have rich, flavorful stock for soups and gravies.

Storing Carved Turkey
Once you’ve finished carving, proper storage keeps your turkey fresh and safe. Remove any remaining meat from the bones within two hours of cooking. Store different cuts separately if possible—white meat tends to dry out faster than dark meat.
- Refrigerator: Place carved turkey in airtight containers or wrap tightly in aluminum foil or plastic wrap. Properly stored turkey will stay fresh for 3-4 days in the refrigerator. Make sure to refrigerate within two hours of carving.
- Freezing: For longer storage, freeze your carved turkey in portion-sized bags or containers. Remove as much air as possible to prevent freezer burn. Frozen turkey maintains quality for 2-3 months and can be thawed in the refrigerator overnight when you’re ready to use it.
- Reheating: When reheating, add a splash of broth or gravy to keep the meat moist. You can reheat in the microwave, oven, or on the stovetop. The oven method at 325°F works best for maintaining texture—just cover the turkey with foil and heat until warmed through.
Serving Suggestions
Your beautifully carved turkey deserves equally delicious accompaniments. Serve it alongside classic sides like crockpot pot roast for a hearty meal, or try it with slow cooker Spanish rice for something different.
For a complete Thanksgiving spread, pair your carved turkey with traditional sides and don’t forget the gravy. If you’ve got leftovers, transform them into creative dishes throughout the week. The sliced breast meat works wonderfully in sandwiches, salads, or sheet pan quesadillas.


FAQs
Let your turkey rest for at least 20-30 minutes after removing it from the oven. This allows the juices to redistribute throughout the meat, making it much easier to carve and ensuring every slice is moist and flavorful. Cover it loosely with foil to keep it warm during this time.
This is entirely up to personal preference. The skin helps hold the breast together while carving, making it easier to get clean slices. However, if no one in your family enjoys eating the skin, you can remove it before slicing. Just be aware that the meat may be slightly more fragile without it.
For sandwiches, slice the turkey breast slightly thinner than you would for a main course presentation—about 1/4 inch thick works perfectly. These thinner slices are easier to layer and give you better flavor distribution in each bite of your sandwich.
Never attempt to carve a frozen turkey breast. The meat needs to be fully thawed and cooked before carving. A frozen or partially frozen turkey is dangerous to carve and won’t give you the clean slices you’re looking for.
Look closely at the surface of the turkey breast and you’ll see parallel lines running through the meat—these are muscle fibers. The grain typically runs lengthwise along the breast. To slice across the grain, make your cuts perpendicular to these lines, which helps create tender, easy-to-chew pieces.