
The Easiest Way to Open a Coconut: Simple Kitchen Method

Learning how to crack open a coconut might seem intimidating at first, but with the right technique and tools, you’ll be enjoying fresh coconut meat and coconut water in no time. This method takes just about a minute once you get the hang of it, making it the best way to open a coconut at home without any special coconut opener tools.
Save This Post!
Whether you’re planning to use the coconut for cooking, baking, or just want to enjoy it fresh, knowing how to properly crack open a coconut is an essential kitchen skill. The technique I’m sharing here uses simple tools you probably already have in your kitchen, so you won’t need to invest in expensive equipment.
Reasons You’ll Love This Coconut Cracking Method
- Quick and Simple: This technique takes just about a minute to crack open a coconut, making it perfect for when you need fresh coconut meat or coconut water fast.
- Uses Common Kitchen Tools: You don’t need specialized coconut opener tools or a machete – just a sturdy knife and a bowl that you likely already have in your kitchen.
- Preserves Coconut Water: By cracking the coconut over a bowl, you’ll catch all that nutritious coconut water instead of letting it spill everywhere.
- Safe and Controlled: Unlike using a hammer or mallet on a hard surface, this method gives you complete control over the cracking process, reducing the risk of injury.
Understanding Mature vs Young Coconuts
Not all coconuts are created equal, and choosing the right type makes a big difference in how you open them and what you’ll find inside. Before you start cracking, it helps to understand which coconut you have and what to expect from each variety.
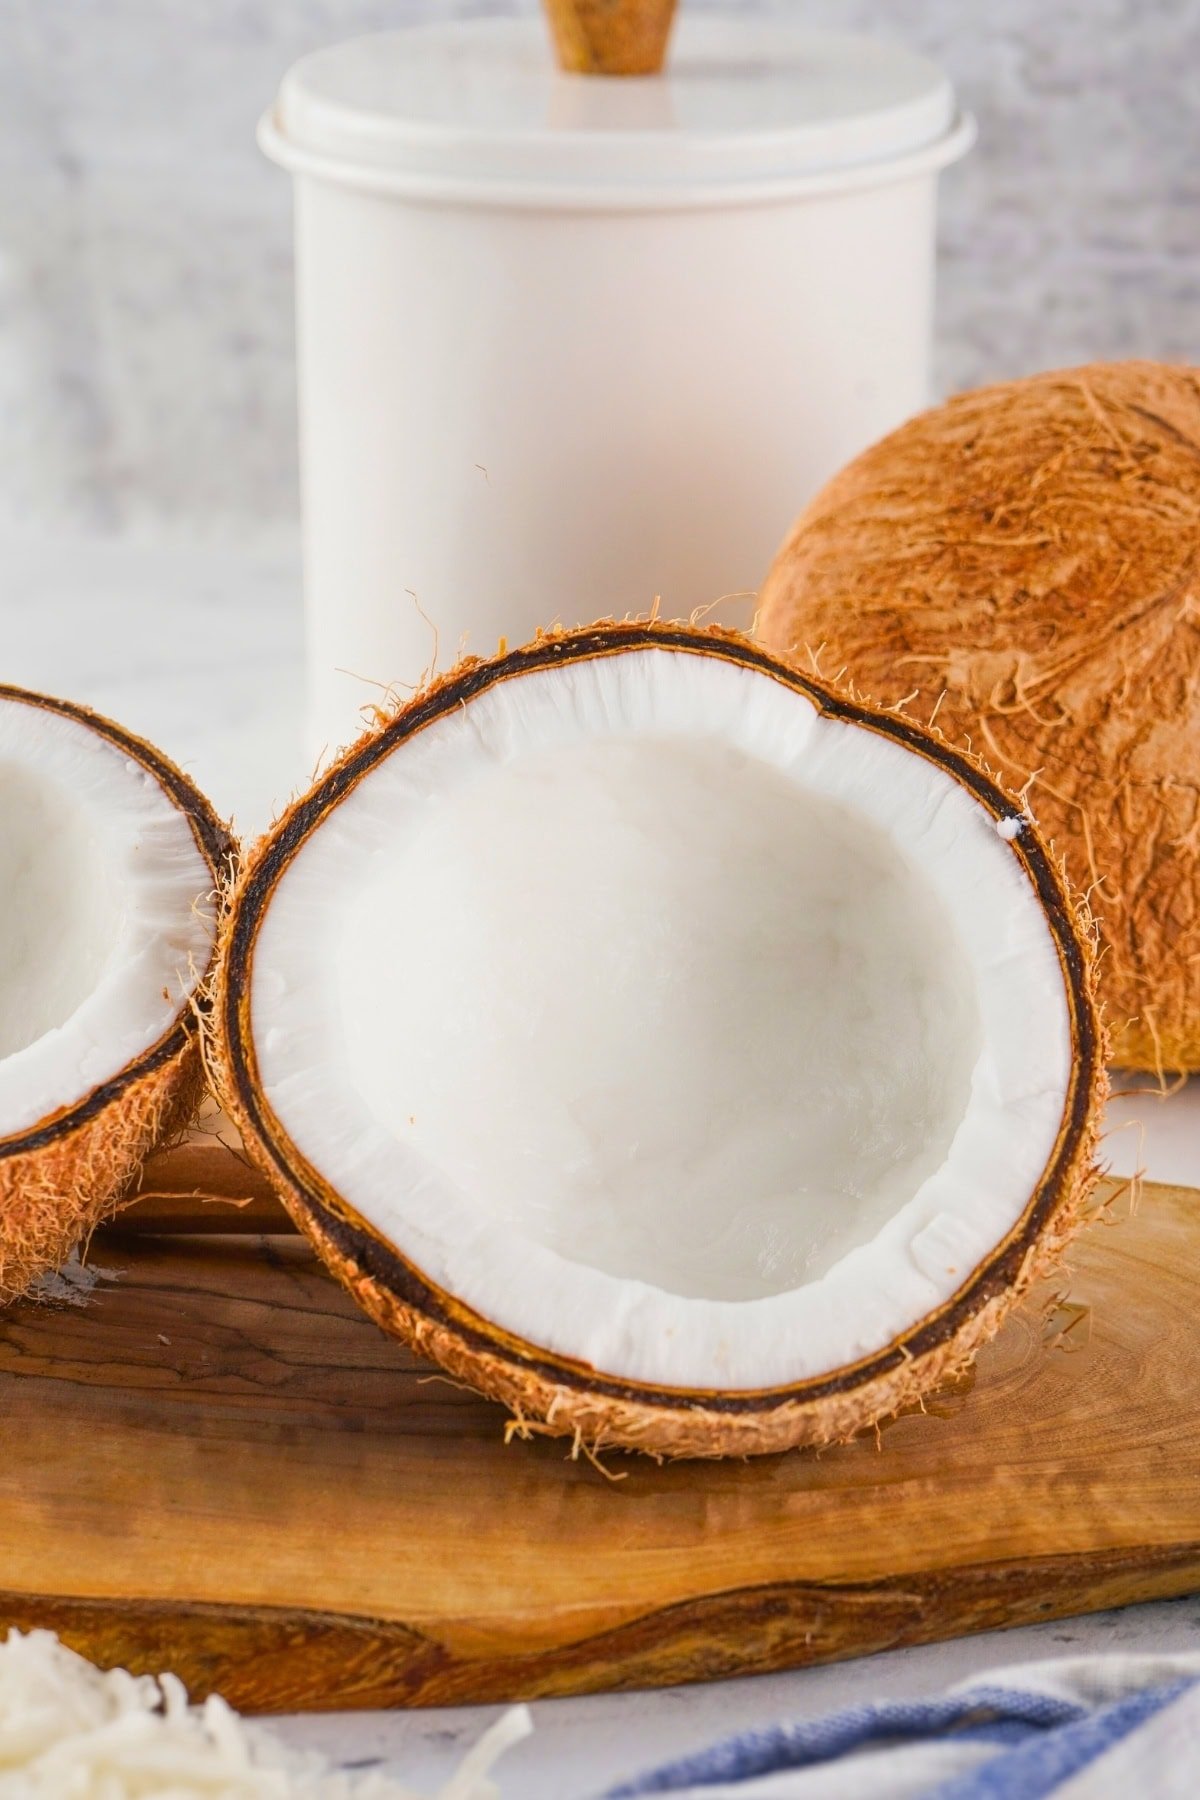
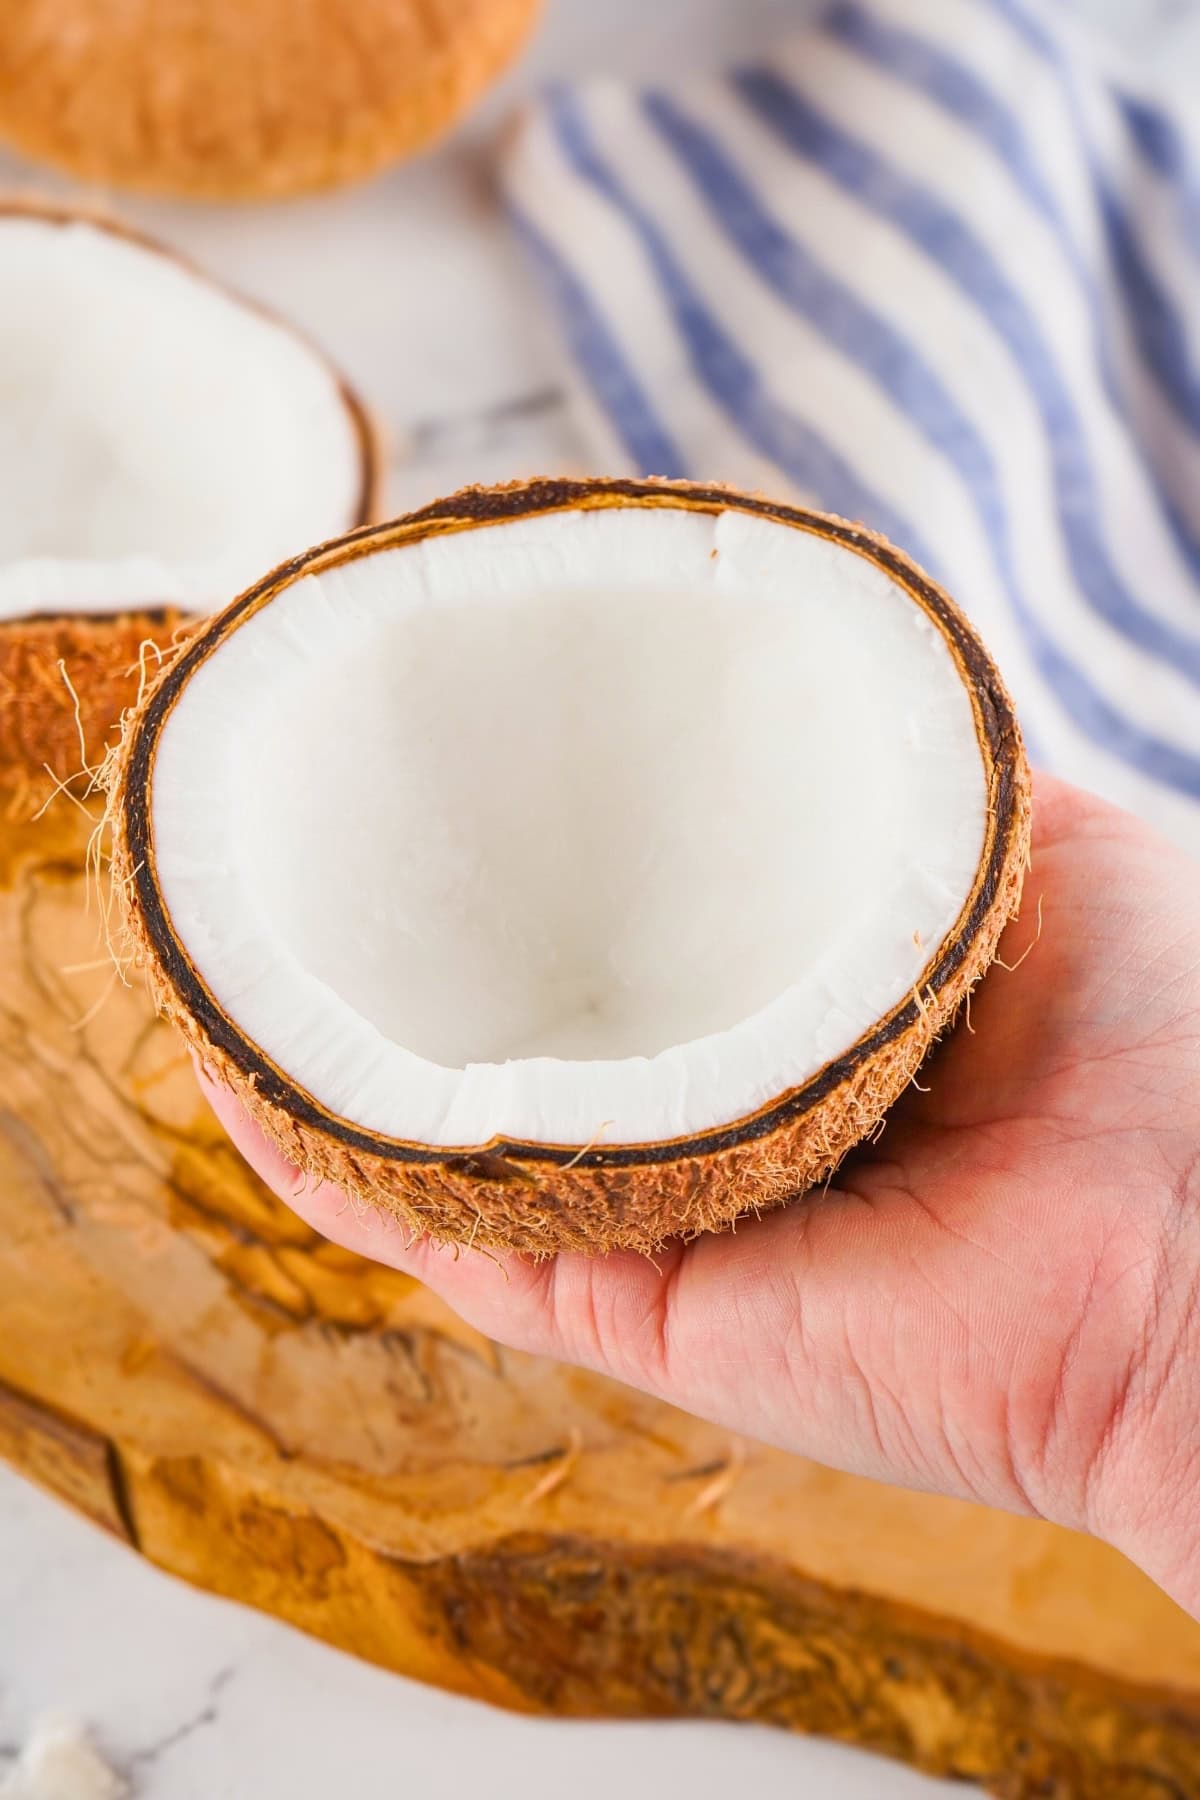
Mature Brown Coconuts are what you typically find in the grocery store produce section. These have a hard, hairy brown shell and contain firm white coconut meat with a thinner layer of coconut water inside. The white meat is thick and solid, making it perfect for grating, shredding, or eating fresh. These are the coconuts this guide focuses on since they’re the most common and accessible variety. The brown shell means the coconut has fully matured on the tree, allowing the meat to develop its rich flavor and firm texture.
Young Green or White Coconuts look completely different from their mature counterparts. You’ll find these in Asian grocery stores or specialty markets, often with their outer green husk removed to reveal a white, cone-shaped shell underneath. Young coconuts contain lots of sweet coconut water and soft, jelly-like meat that can be scooped out with a spoon. These require a different opening technique – typically using a cleaver to cut off the top rather than cracking them around the middle. The soft meat in young coconuts is delicious but can’t be grated or shredded like mature coconut meat.
Which Should You Buy? If you’re planning to make recipes that call for shredded coconut, coconut flour, or coconut milk, go with mature brown coconuts. Choose young coconuts if you mainly want refreshing coconut water to drink or soft meat for smoothies and desserts. Mature coconuts typically cost less and are easier to find year-round at regular grocery stores.
What You’ll Need to Crack Open a Coconut
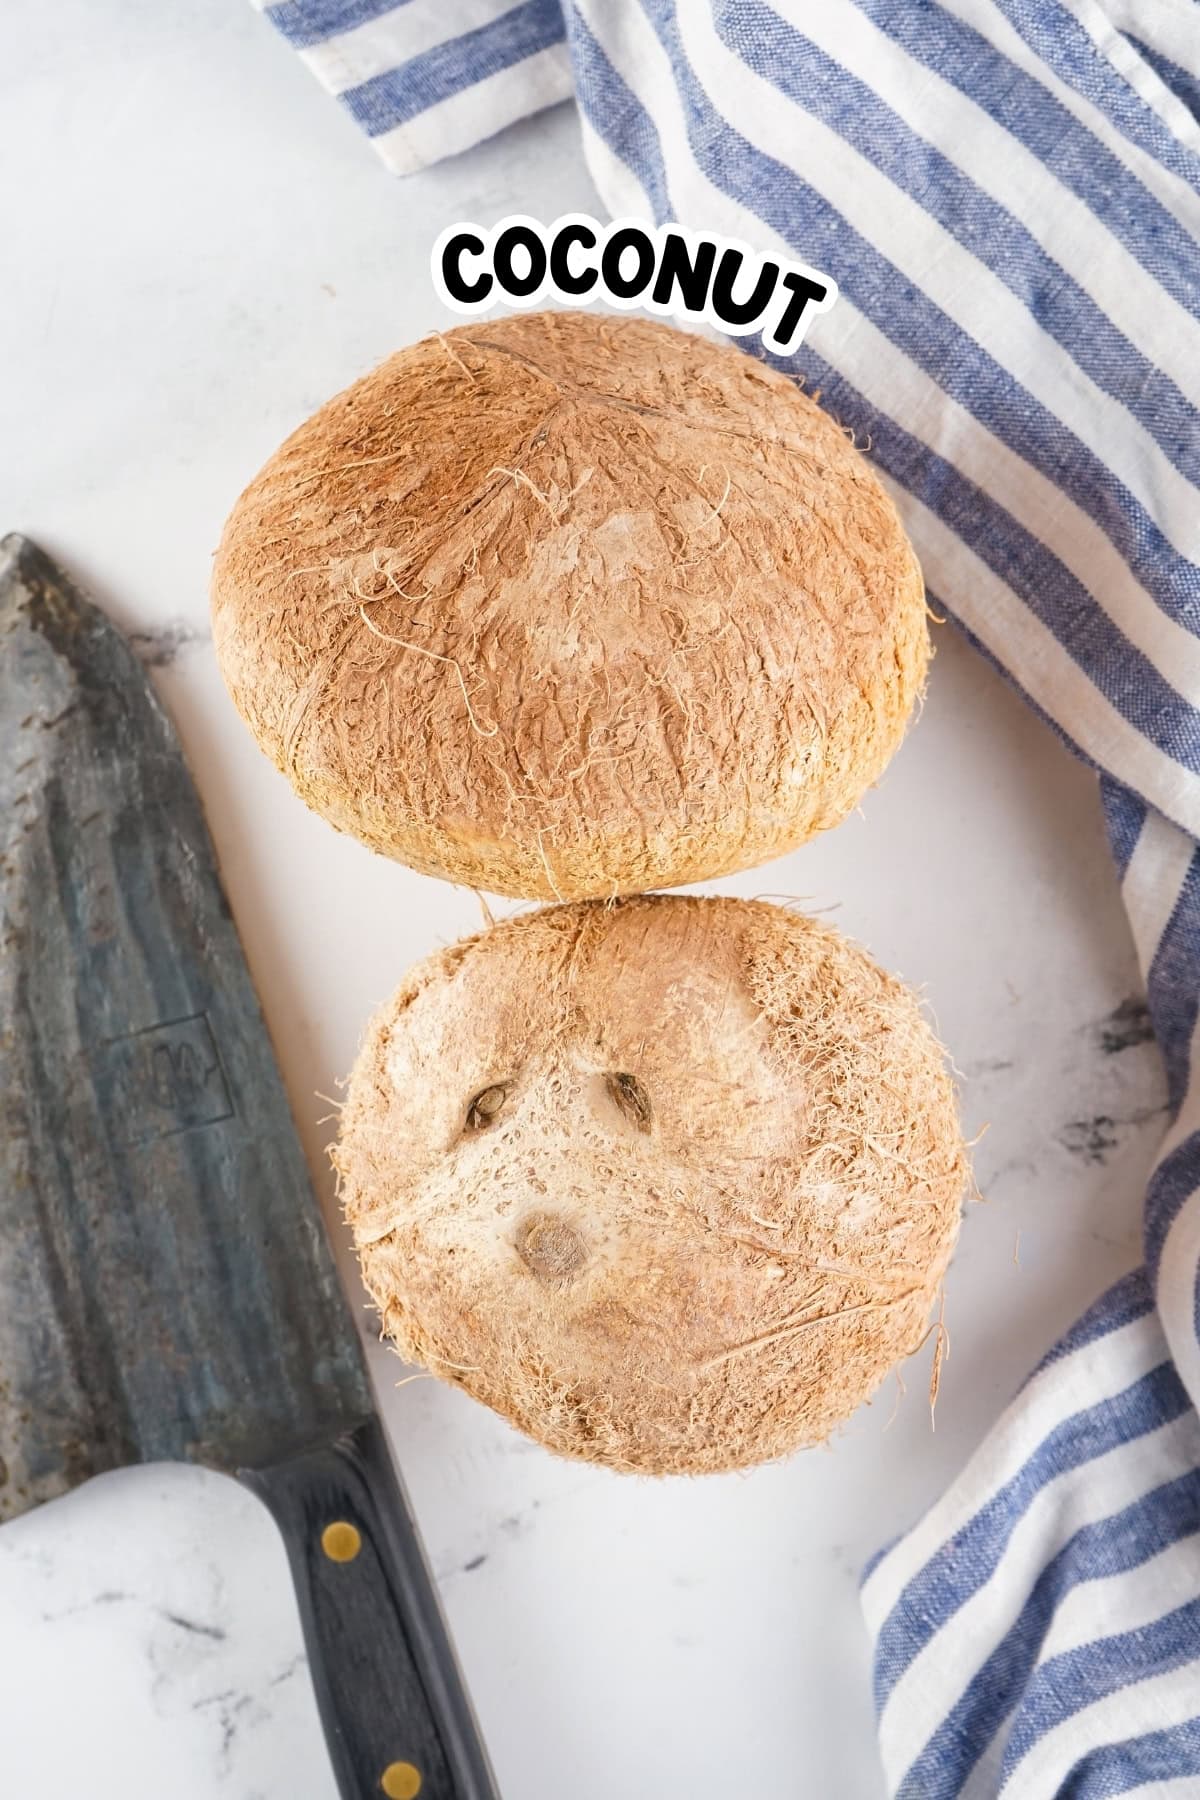
- Fresh Coconut – Choose one that feels heavy for its size and sounds full of liquid when you shake it. Avoid coconuts with cracks in the shell or any signs of mold.
- Large Sturdy Knife – A stainless steel knife with a thick spine works best. The blade should be strong enough to withstand repeated strikes without breaking or chipping.
- Medium Bowl – This will catch the coconut water as it drains from the cracked shell. Make sure it’s large enough to hold the coconut halves as well.
How to Crack Open a Coconut (Step-by-Step)
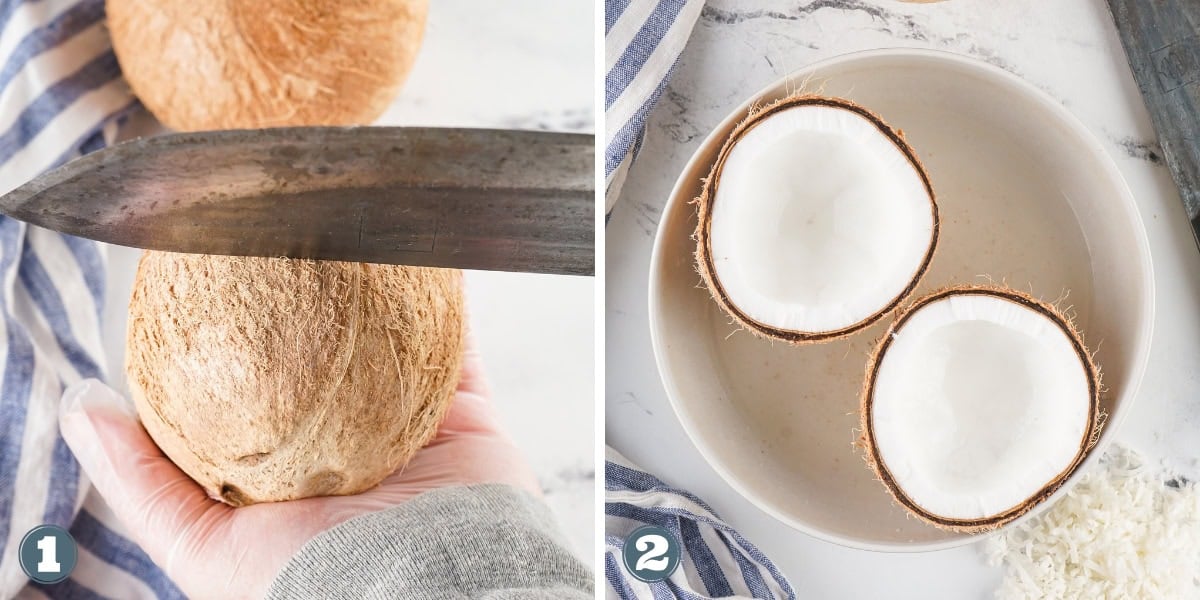
STEP 1. Start by placing your medium bowl on a stable surface in front of you. Hold the coconut firmly in your non-dominant hand, making sure you have a secure grip on the shell.
STEP 2. Take your large knife in your dominant hand, but here’s the key – you’ll be using the back edge of the knife, not the sharp cutting blade. Position the knife so it will strike the coconut around the circumference, meaning the top and bottom of the coconut should be to the right and left of where the knife hits.
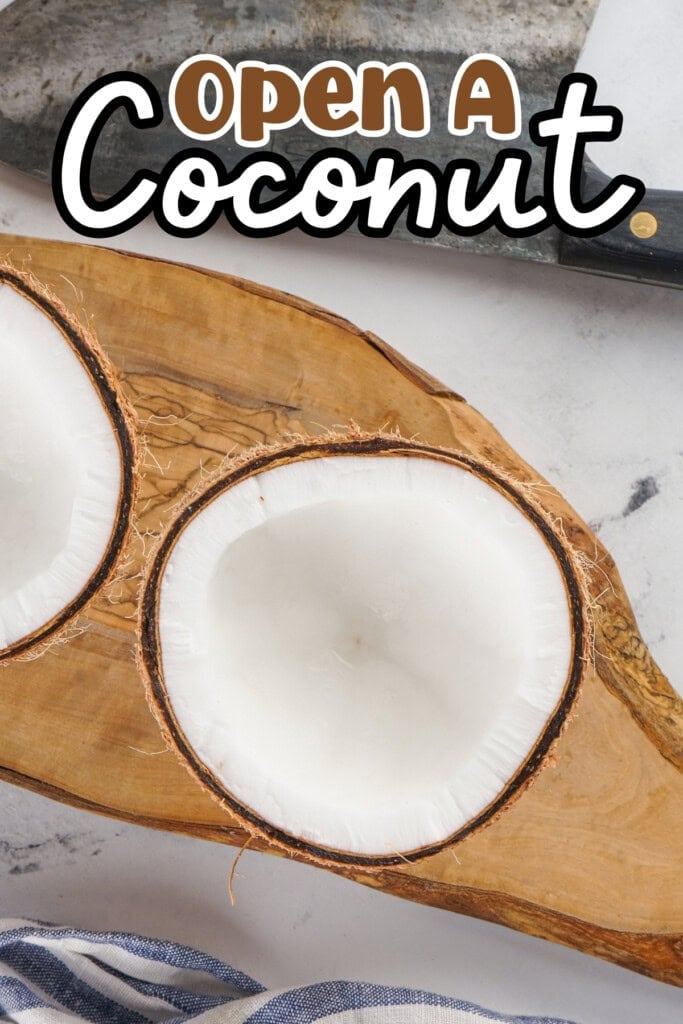
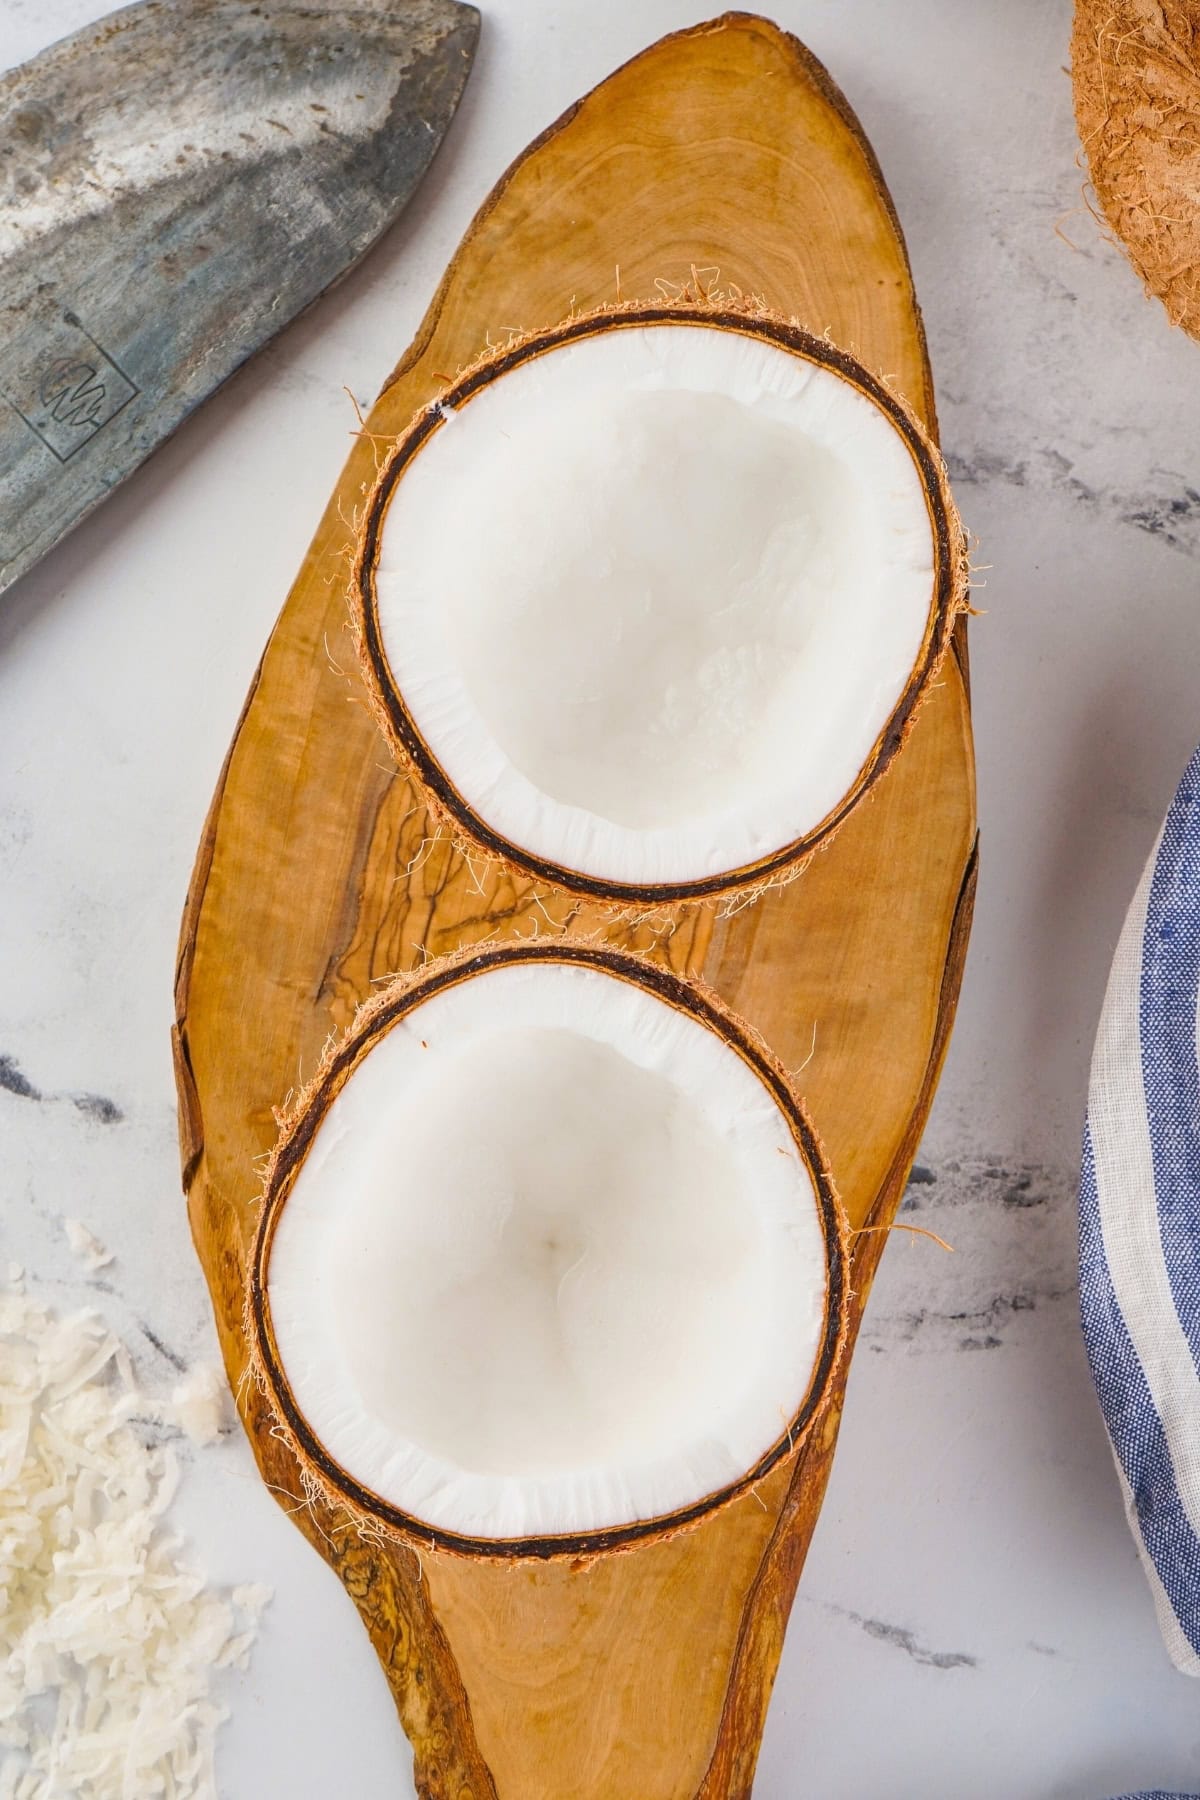
STEP 3. Strike the coconut with the back of the knife directly in the middle width-wise. After the first hit, give the coconut a quarter turn and strike again. Continue this pattern – hit, turn, hit, turn – until you see a crack in the shell forming all the way around. (Photo 1)
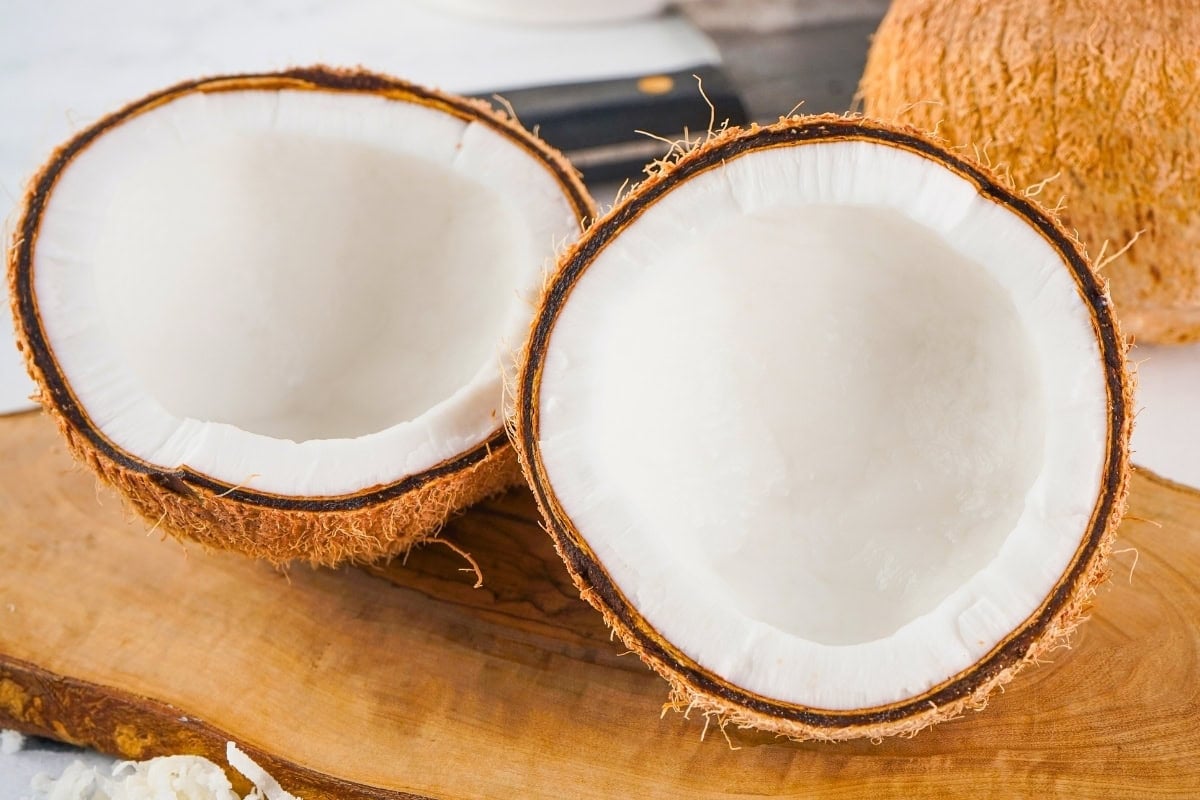
STEP 4. The coconut will naturally split into two halves once the crack goes completely around the circumference. The number of hits needed varies depending on the coconut and how much force you use, but most coconuts crack open after 4-8 good strikes. (Photo 2)
Essential Tips for Opening Coconuts
- Don’t Pull the Knife Too Far Back: Keep your strikes controlled by not pulling the knife too far from the coconut. This greatly reduces the chance of missing and helps you maintain better control over the process.
- Never Set the Coconut Down: Always hold the coconut in your hand while striking it. If you place it on a surface, it will slip and slide, making it much harder to crack and potentially dangerous.
- Check the Coconut Water: Before drinking or using the coconut water, strain it through fine cheesecloth and check that it hasn’t gone bad. Sometimes store-bought coconuts can have good flesh but spoiled liquid.
- Use the Right Angle: Make sure you’re hitting around the circumference, not trying to cut the coconut lengthwise. This natural breaking point makes the coconut much easier to crack in half.
Storing Tips
- Storage: Store cracked coconut meat in an airtight container in the refrigerator for the best freshness and to prevent it from drying out.
- Refrigerator: Keep your fresh coconut meat in an airtight container or sealed baggie for up to 4 days. The coconut water should be used within 2-3 days for the best flavor.
- Freezing: While you can freeze coconut meat, the texture will change slightly. Grated coconut freezes better than large pieces and can be stored for up to 6 months.
- Reheating: Fresh coconut is best enjoyed at room temperature or cold. If you’ve frozen grated coconut, let it thaw completely before using in recipes..
What to Do with Fresh Coconut
Once you know how to open a coconut, you’ll want to put that fresh coconut meat and coconut water to good use! The coconut meat can be eaten fresh, grated for baking, or used in smoothies. For sweet treats, try making Coconut Fudge or adding fresh coconut to your favorite Cookie Recipes.
The coconut water is packed with electrolytes and makes a refreshing drink on its own, or you can use it as a base for tropical smoothies and cocktails. If you’re feeling creative, coconut water works wonderfully in Frozen Pina Coladas or other Summer Cocktails.
4 More Ways to Open a Coconut
While the knife method is quick and efficient, these alternative techniques work great depending on what tools you have available and how often you open coconuts at home.
The Oven Method
This method makes removing the coconut meat from the shell incredibly easy by causing the meat to shrink away from the shell naturally.
First, drain the coconut water by using a screwdriver or metal skewer to punch holes in two of the three “eyes” at the top of the coconut – one to let the liquid out, one to let air in. Pour the coconut water through a strainer into a container and set aside.
Preheat your oven to 375°F (190°C) and place the drained coconut on a baking sheet. Bake for 15-20 minutes until you hear the shell crack or see visible cracks forming around the coconut. The heat causes the coconut meat inside to shrink away from the shell, making it much easier to remove later.
Remove the coconut from the oven (it will be hot!) and let it cool just enough to handle safely. Using a hammer or the back of a heavy knife, tap around the circumference of the coconut until it breaks apart. The meat should pop out easily in large pieces, sometimes even as one whole piece.
- Best for: When you want the easiest meat removal possible, or when working with multiple coconuts at once.
- Pros: Meat comes out cleanly and easily, minimal effort after baking.
- Cons: Takes longer than other methods (about 20-25 minutes total), requires draining the water first, uses your oven.
The Hammer and Screwdriver Method
This classic technique gives you maximum control and works with tools most people already have in their garage or toolbox.
Start by draining the coconut water. Place the coconut in your non-dominant hand or on a folded towel on your counter (to keep it steady). Take a clean screwdriver and position it on one of the three eyes at the top of the coconut. Use a hammer to tap the screwdriver through the eye – you’ll feel it break through. Repeat with a second eye, then drain the coconut water into a bowl through a strainer.
Once drained, hold the coconut over a large bowl or outside over grass. Using just the hammer, tap firmly around the coconut’s equator (the widest part running around the middle). Keep rotating the coconut as you tap, hitting the same imaginary line all the way around. After several rotations, you’ll see a crack forming. Continue tapping until the coconut splits in half.
To remove the meat from the shell, place each half face-down on a cutting board and tap the back of the shell with the hammer – the meat will loosen and fall out in chunks.
- Best for: When you don’t have a large knife, or when you want more control over the cracking process.
- Pros: Uses common household tools, very controlled process, no risk of knife slippage.
- Cons: Requires draining water first (separate step), can be messy, takes a few extra minutes.
The Tool-Free Method (Hard Surface)
Sometimes you just want to crack a coconut without any tools at all – this primitive but effective method works great outdoors or in the garage.
Find a hard surface with a bit of an edge – concrete steps, brick walls, or even a large flat rock work perfectly. Hold the coconut firmly in both hands and throw it down onto the hard surface with good force, or slam it against a brick wall or concrete edge. The key is hitting it around the middle (the equator) rather than on the top or bottom.
After the first impact, rotate the coconut slightly and hit it again on the same imaginary line around the middle. Keep rotating and hitting until you see cracks forming. Once you have a good crack started, you can often pry the coconut apart with your hands. Catch any coconut water in a bowl if possible, though this method usually results in losing some of the liquid.
- Best for: When you’re outdoors, camping, or simply don’t have any tools handy.
- Pros: No tools required, surprisingly effective, kind of fun.
- Cons: Messy (bits of shell fly everywhere), you’ll lose the coconut water, less precise than other methods, not ideal indoors.
The Freezer Method (For Easy Meat Removal)
This clever technique doesn’t actually crack the coconut, but it makes removing the meat from the shell effortless by changing the meat’s texture.
Place your whole, uncracked coconut in the freezer and leave it overnight (or for at least 8-12 hours). The freezing process causes the coconut meat to contract and pull away from the shell naturally.
Remove the frozen coconut from the freezer and let it sit at room temperature for about 10-15 minutes – just enough time to make handling easier but not so long that it fully thaws. Use the hammer method or knife method described earlier to crack the shell. You’ll notice the frozen meat pops out of the shell much more easily than fresh coconut meat would, often coming out in beautiful whole pieces.
Let the coconut meat thaw completely before using it in recipes. The freezing process might slightly change the texture, but it remains perfectly delicious for eating fresh, grating, or making into coconut milk.
- Best for: When you’re not in a rush and want the absolute easiest meat removal, or when preparing coconuts for later use.
- Pros: Meat removal is incredibly easy, minimal effort during cracking, great for meal prep.
- Cons: Requires planning ahead (overnight freezing), slight texture change, can’t drink the coconut water fresh (it will be frozen).
Choosing Your Method
Pick the knife method for speed and efficiency with minimal cleanup. Choose the oven method when working with multiple coconuts or want effortless meat removal. Use the hammer and screwdriver if you don’t feel comfortable with the knife technique or want maximum control. Go with the tool-free method when you’re outdoors or in a pinch without equipment. Try the freezer method when you’re planning ahead and want the meat to practically fall out of the shell.
Troubleshooting: When Coconut Opening Goes Wrong
Even with the best technique, sometimes coconuts don’t cooperate. Here are the most common problems people encounter when opening coconuts at home, and exactly how to fix them.
Problem: The coconut won’t crack even after many hits
This usually happens when you’re hitting the coconut in the same spot repeatedly instead of rotating it around the circumference. The shell is extremely hard in a single spot, but it’s designed to break along that natural line around the middle.
Solution: Make sure you’re rotating the coconut after each strike, creating a continuous crack line around the entire equator. If you’ve been hitting one spot, start fresh by rotating the coconut and beginning your strikes on the opposite side. Try increasing your striking force slightly – you need firm, confident hits rather than timid taps. If the coconut still won’t crack after going around 3-4 times, try the oven method instead to pre-weaken the shell with heat.
Problem: The coconut water tastes sour or fermented
Fresh coconut water should taste slightly sweet with a clean, neutral flavor. If it tastes sour, fizzy, or has any off-putting smell, the coconut has gone bad inside, even if the shell looks fine.
Solution: Unfortunately, there’s no way to fix spoiled coconut water – dump it out immediately. However, the coconut meat might still be perfectly fine. Crack open the coconut and check the white meat. If it’s bright white with no discoloration, smells fresh (not sour), and has a firm texture, you can still use the meat even though the water spoiled. Always trust your nose – if the meat smells funky, discard the entire coconut. This is why checking for sloshing water and heaviness before buying coconuts is so important.
Problem: The coconut meat won’t come out of the shell
Sometimes the white meat stubbornly clings to the inside of the shell, making it nearly impossible to pry out in whole pieces.
Solution: Use the oven trick even after you’ve cracked the coconut open. Place the coconut halves (shell side up, meat side down) on a baking sheet and bake at 375°F for 5-10 minutes. The heat will cause the meat to shrink away from the shell. Let cool slightly, then use a butter knife to wedge between the meat and shell – it should pop out much more easily. Alternatively, you can freeze the cracked coconut halves for an hour, which also helps the meat release from the shell. If all else fails, use a sturdy spoon to scrape the meat out in smaller pieces rather than trying to remove it whole.
Problem: The crack went the wrong direction (lengthwise instead of around the middle)
Sometimes the coconut decides to crack from top to bottom instead of splitting neatly in half around the circumference, leaving you with an awkward break.
Solution: Don’t worry – you can still recover all the coconut meat and water! First, hold the pieces over a bowl to catch any remaining coconut water. Use a hammer to carefully break the coconut further into smaller, more manageable pieces. Once you have smaller sections, it’s actually easier to pry the meat away from the shell. Use a butter knife or small spoon to work the meat out piece by piece. While it’s not as clean as a perfect half-shell crack, you’ll still get all the usable coconut – it just takes a few extra minutes.
Problem: No sloshing sound when I shake the coconut
When you pick up a coconut and don’t hear any liquid moving inside, it means the coconut water has dried up inside, usually because the coconut is older or has been stored too long.
Solution: The coconut is still usable! Without the coconut water, the coconut becomes lighter, and the meat inside is typically more mature and drier, which actually makes it easier to grate or shred. Open the coconut using any method above – you might find it cracks more easily since there’s no liquid putting pressure on the shell. The meat should still be white and smell fresh. This type of coconut is perfect for making shredded coconut or toasting coconut flakes since the drier meat grates beautifully. If the meat is discolored (yellow, gray, or pink) or smells bad, discard it.
Problem: Shell pieces and fibers are getting everywhere
Cracking coconuts is inherently messy – those shell splinters and brown fibers seem to fly everywhere and stick to the white meat.
Solution: Work over a large bowl or baking sheet to catch most of the debris, or do the cracking outside if weather permits. For the method where you hold the coconut over a bowl, line the bowl with a kitchen towel first – it catches shell pieces while still allowing the coconut water to drain through into the bowl below. After removing the meat from the shell, rinse each piece under cold water to wash away any clinging brown fibers or shell dust. For stubborn fibers, use a vegetable peeler to remove the thin brown skin along with any stuck fibers. Having a clean, damp cloth nearby to wipe down your work surface immediately helps keep the mess contained.
Problem: The coconut water is pink or gray-tinted
Clear or slightly cloudy white coconut water is normal, but if you see pink, gray, or any unusual colors, something is wrong inside the coconut.
Solution: Pink or gray coconut water indicates bacterial growth or oxidation, meaning the coconut has spoiled. Do not drink the water or use any part of the coconut – discard it completely. This discoloration happens when coconuts are damaged, cracked (even microscopically), or stored improperly before you bought them. To avoid this in the future, always inspect coconuts carefully before purchasing. Look for any soft spots, cracks in the shell, or mold around the eyes. A good coconut should feel heavy, sound full when shaken, and have no visible damage to the outer shell.
Problem: I’m struggling to hold the coconut steady while striking it
The coconut keeps rolling or slipping in your hand, making it dangerous to strike with a knife or hammer.
Solution: Never place the coconut directly on a counter or cutting board – it will roll uncontrollably. Instead, fold a kitchen towel or dishcloth into a nest shape and cradle the coconut in your non-dominant hand with the towel cushioning it. The fabric provides grip and keeps the coconut from slipping. If you still feel uncomfortable holding it, try placing the coconut in a small bowl that’s just slightly smaller than the coconut – this creates a stable base while still allowing you to rotate it as needed. For the hammer method, some people prefer placing the coconut inside a plastic bag, then setting it on a firm towel on the ground (rather than holding it), which contains the mess while keeping it stable.
Frequently Asked Questions
Yes, when done properly with the back of the knife (not the blade), this method is safe and controlled. Always hold the coconut securely and keep your strikes measured rather than wild swings.
A fresh coconut should feel heavy and sound full of liquid when shaken. Avoid coconuts with visible cracks, soft spots, or any signs of mold on the shell.
Absolutely! Fresh coconut water can be stored in the refrigerator for 2-3 days. Strain it through cheesecloth first to remove any shell particles, and always taste it to make sure it hasn’t spoiled.
Coconut water is the clear liquid inside the coconut, while coconut milk is made by grating the white coconut meat and mixing it with water. Both are delicious, but they have different uses in cooking and baking.
The thin brown skin on coconut meat is edible, but many people prefer to remove it for a cleaner appearance and milder flavor. You can scrape it off with a vegetable peeler or sharp knife.
Need More Guides? Try These:
- Understanding Common Dietary Restrictions: A Complete Guide for Everyone
- The Complete Guide to Lemon Substitutes
- Measuring Ingredients: The Ultimate Guide to Perfect Cooking & Baking
- The Ultimate Guide to Grilling Vegetables on the BBQ
- How to Pair Food with Wine: A Complete Guide
- See all our guides and basic recipes!