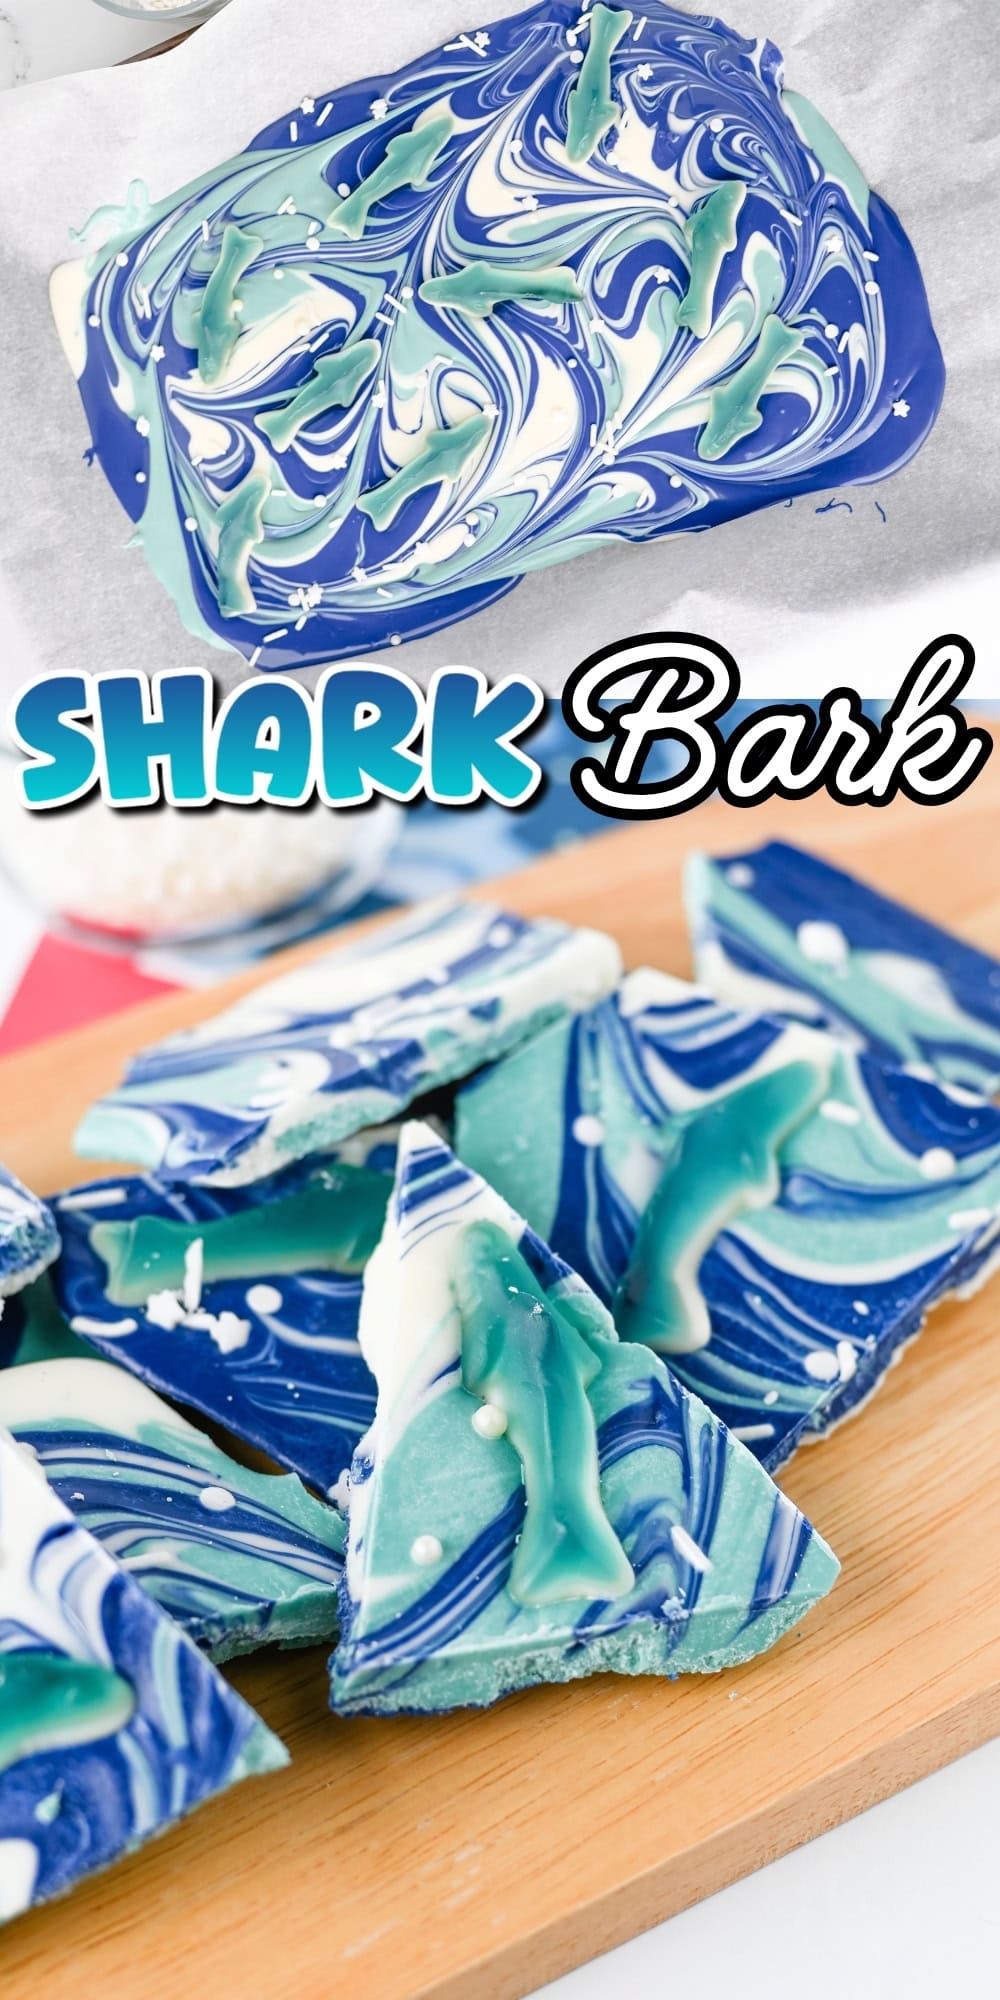
Blue Shark Bark Candy
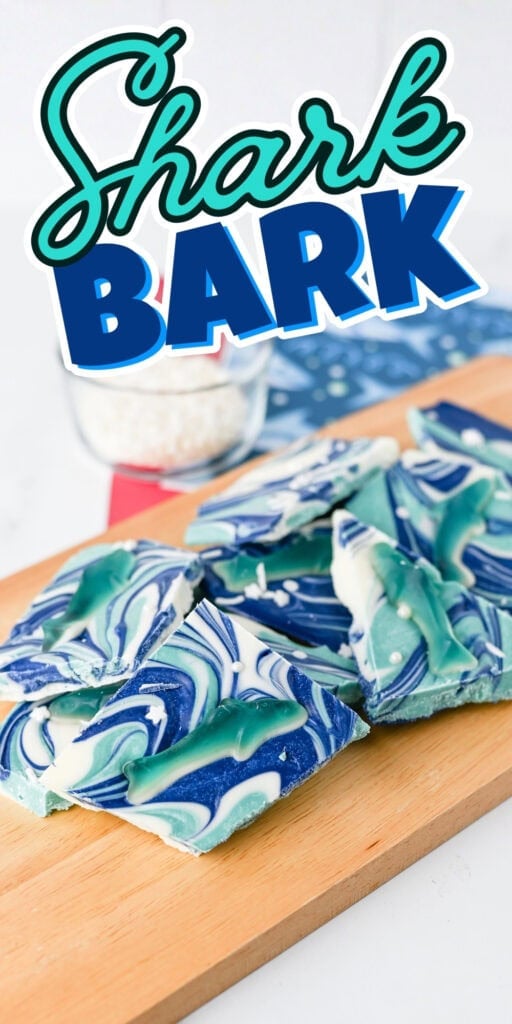

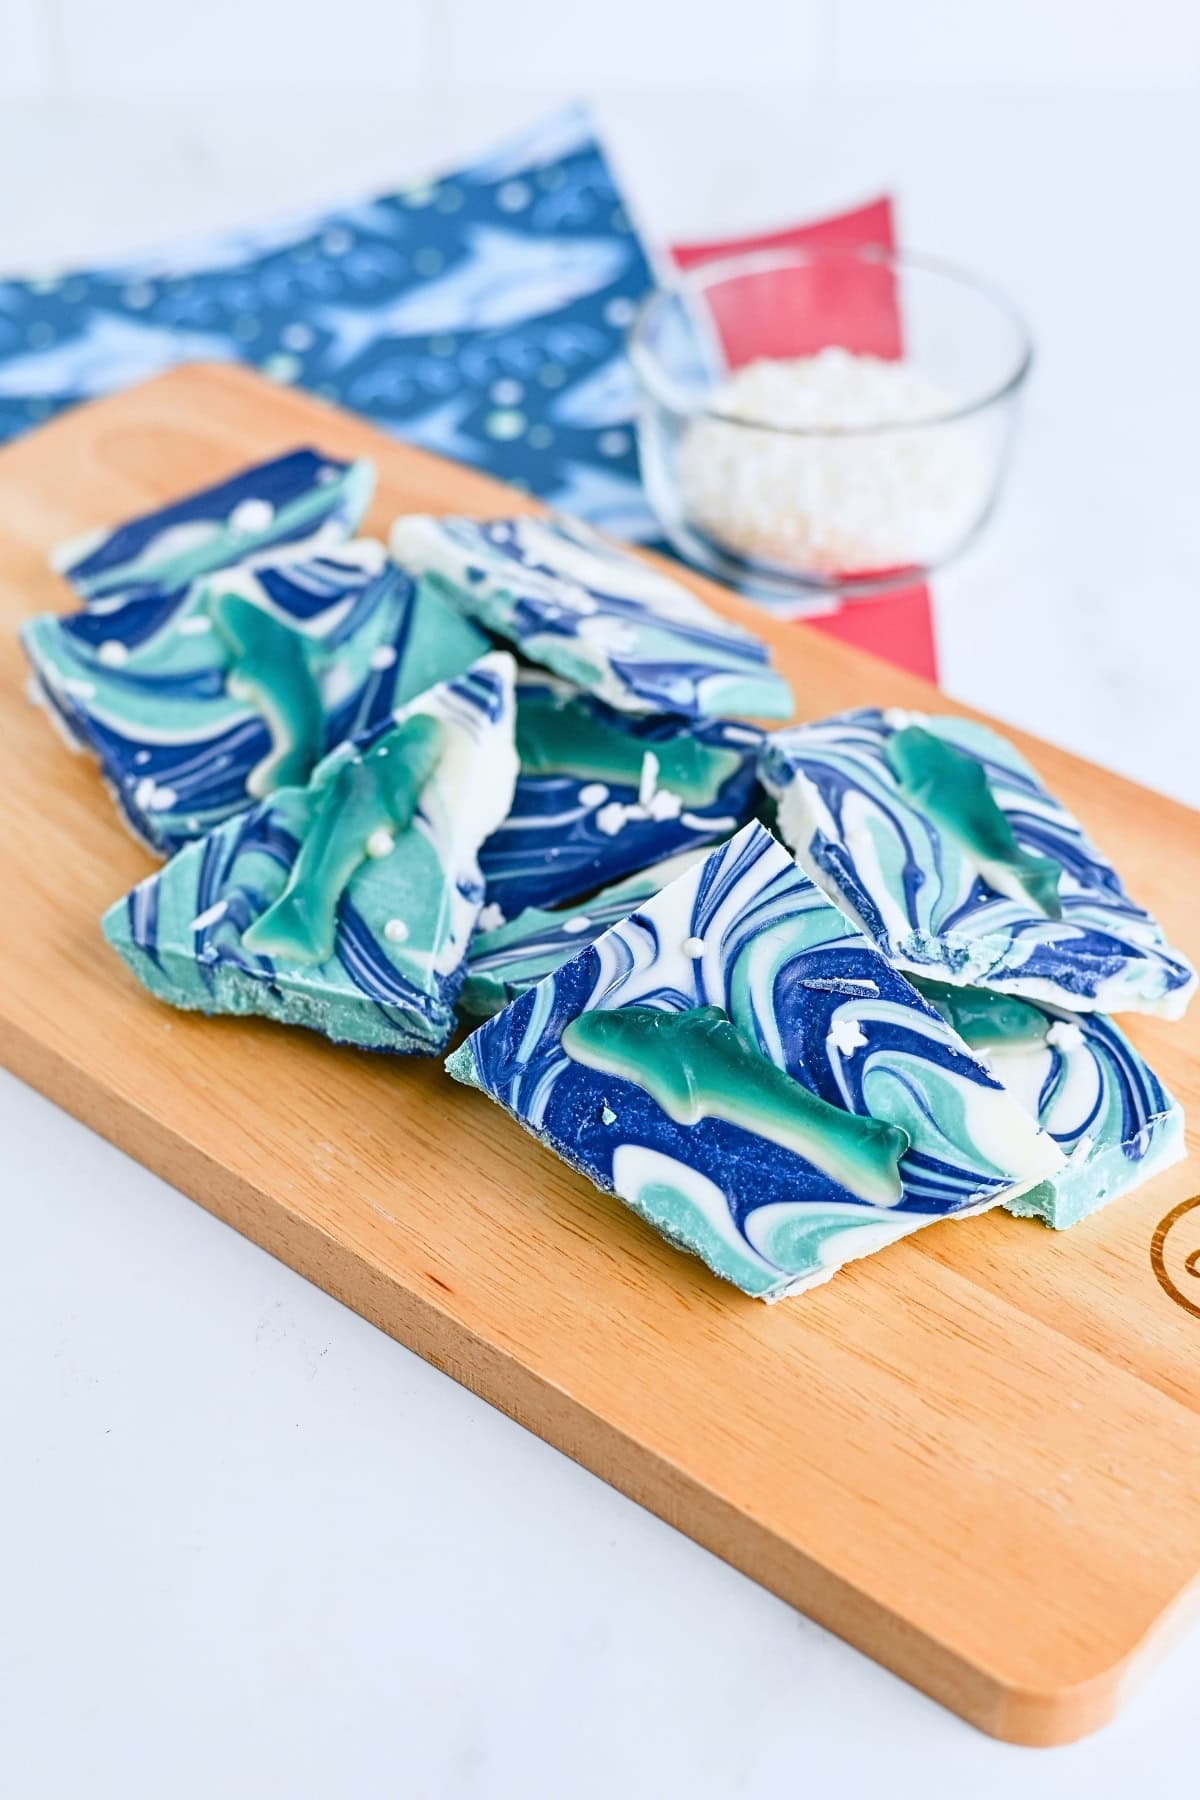
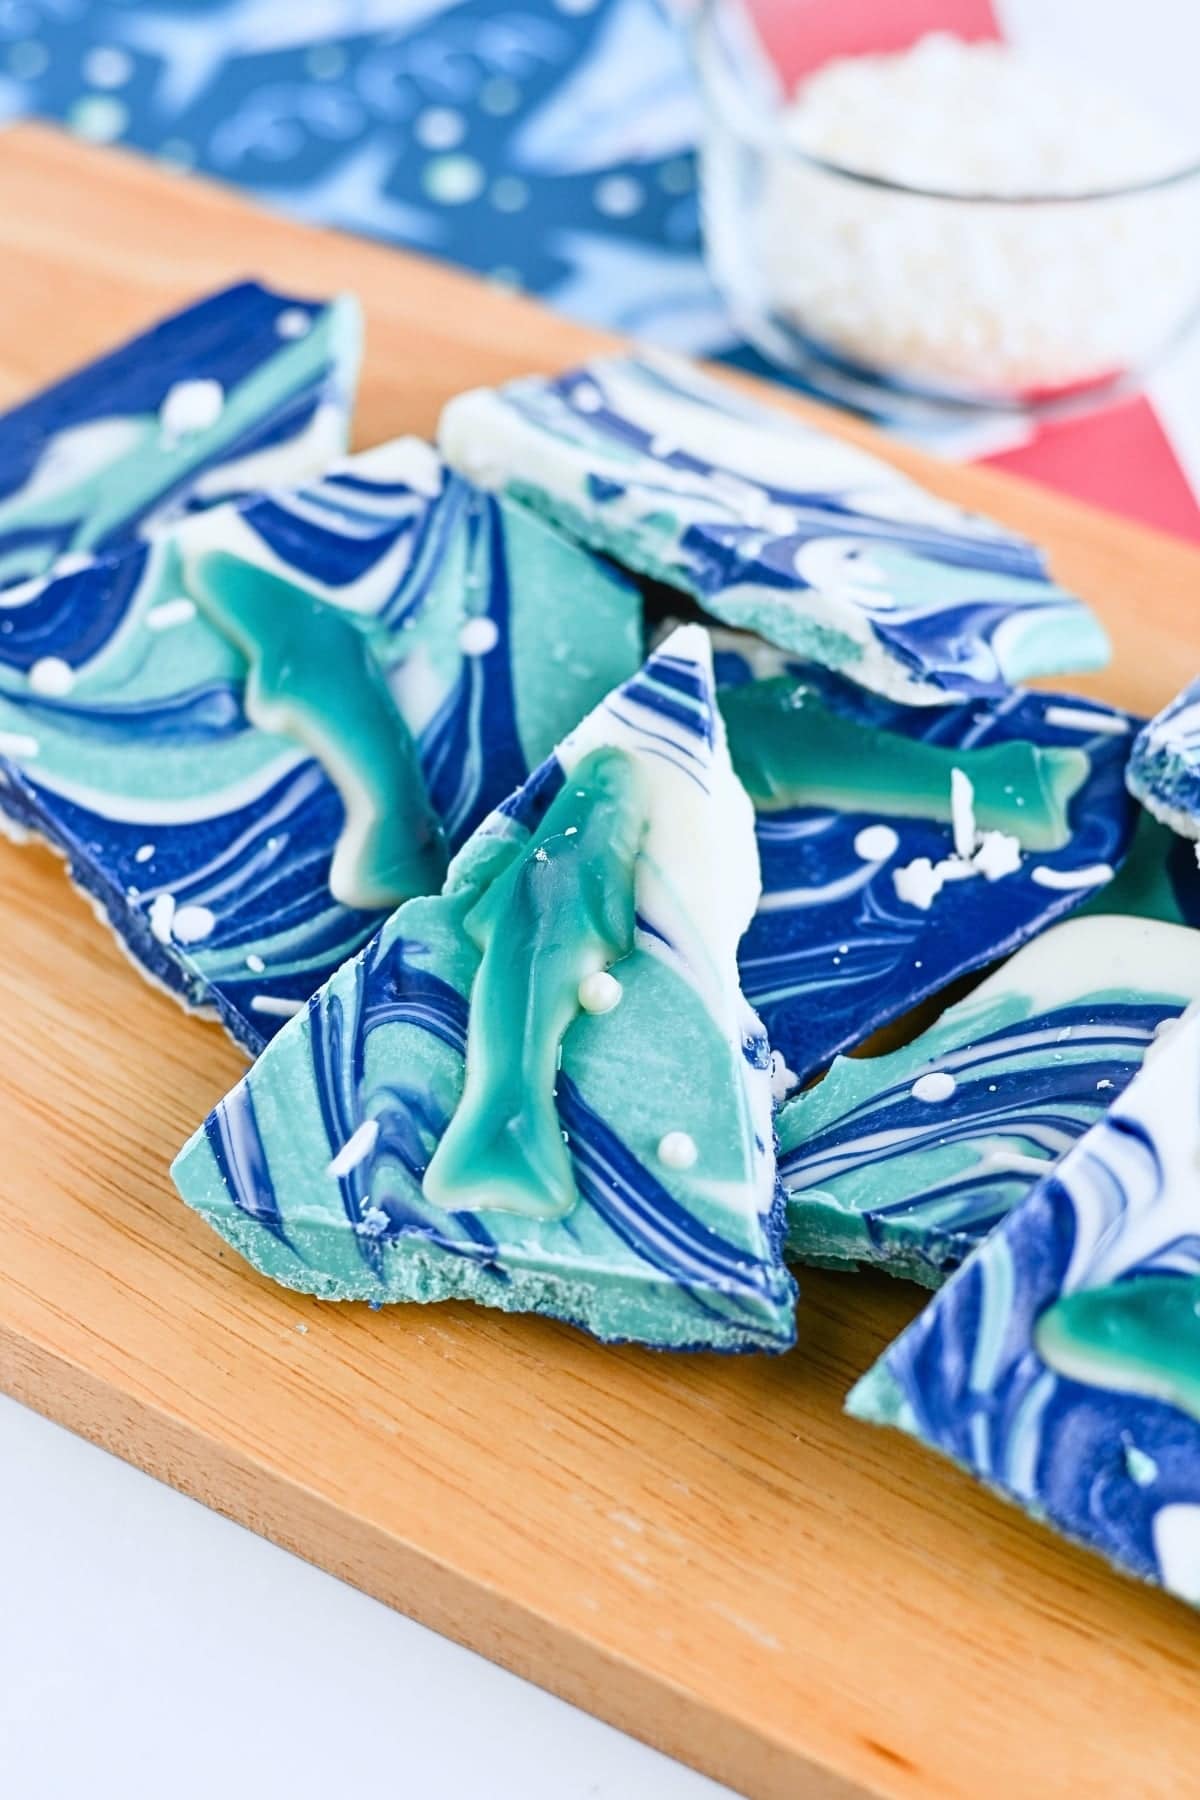
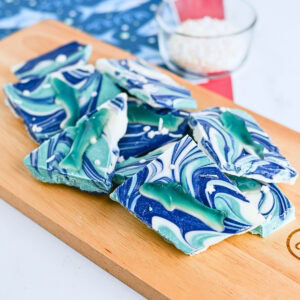
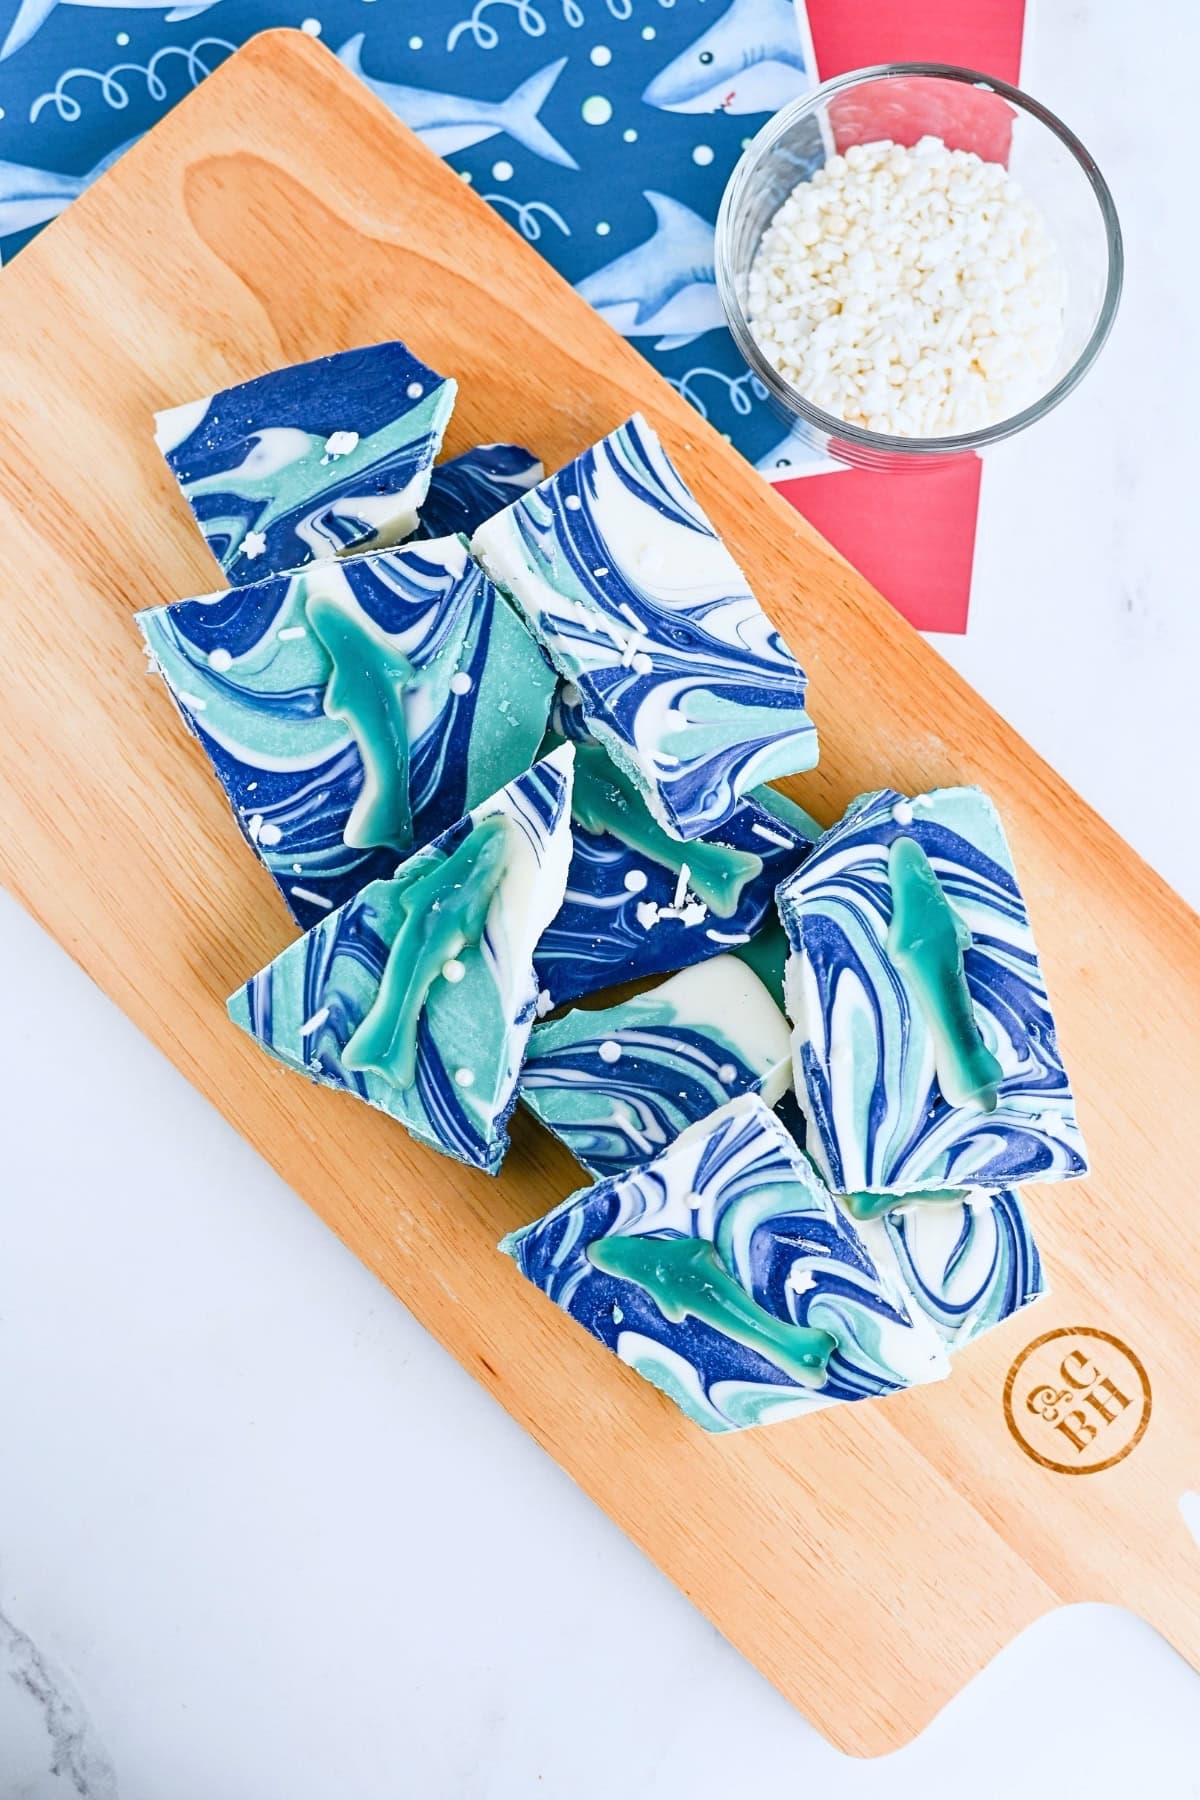
Shark Bark is a blue and white candy bark with shark gummies and sprinkles. With only 5 ingredients and 20 minutes of prep, this is an easy treat that’s perfect for Shark Week. The broken pieces look like swirled ocean water with gummy sharks on top.
Save This Post!
Shark candy bark is a simple melt-and-swirl candy with a Shark Week look. The blue candy melts make the color bold, and the white almond bark gives the swirl a clean stripe through the darker coating. Shark gummies and white sprinkles complete the candy.
If you’re planning a shark or beach theme, Shark Week Printables would be a good extra for the table. Beach Cupcakes also fit the ocean theme, especially with the blue candy colors here. You could also try my Chocolate Bark Recipe for a different bark base, and these Frozen Gummy Bears are another fun recipe to try.
Why You’ll Love It
- Ocean colors: Dark blue, light blue and white candy make the bark look like moving water once you swirl the colors together.
- Simple candy project: The recipe uses melted coatings, gummies and sprinkles, so there’s no boiling sugar or candy thermometer required.
- Clear shark theme: Gummy sharks sit right on the bark, so everyone can tell what it is right away.
- Kid-friendly decorating: Sprinkles and gummy sharks are added by hand, which makes this a fun recipe for a party prep day. Trust me, the kids are going to love this!
Shark Bark Ingredients
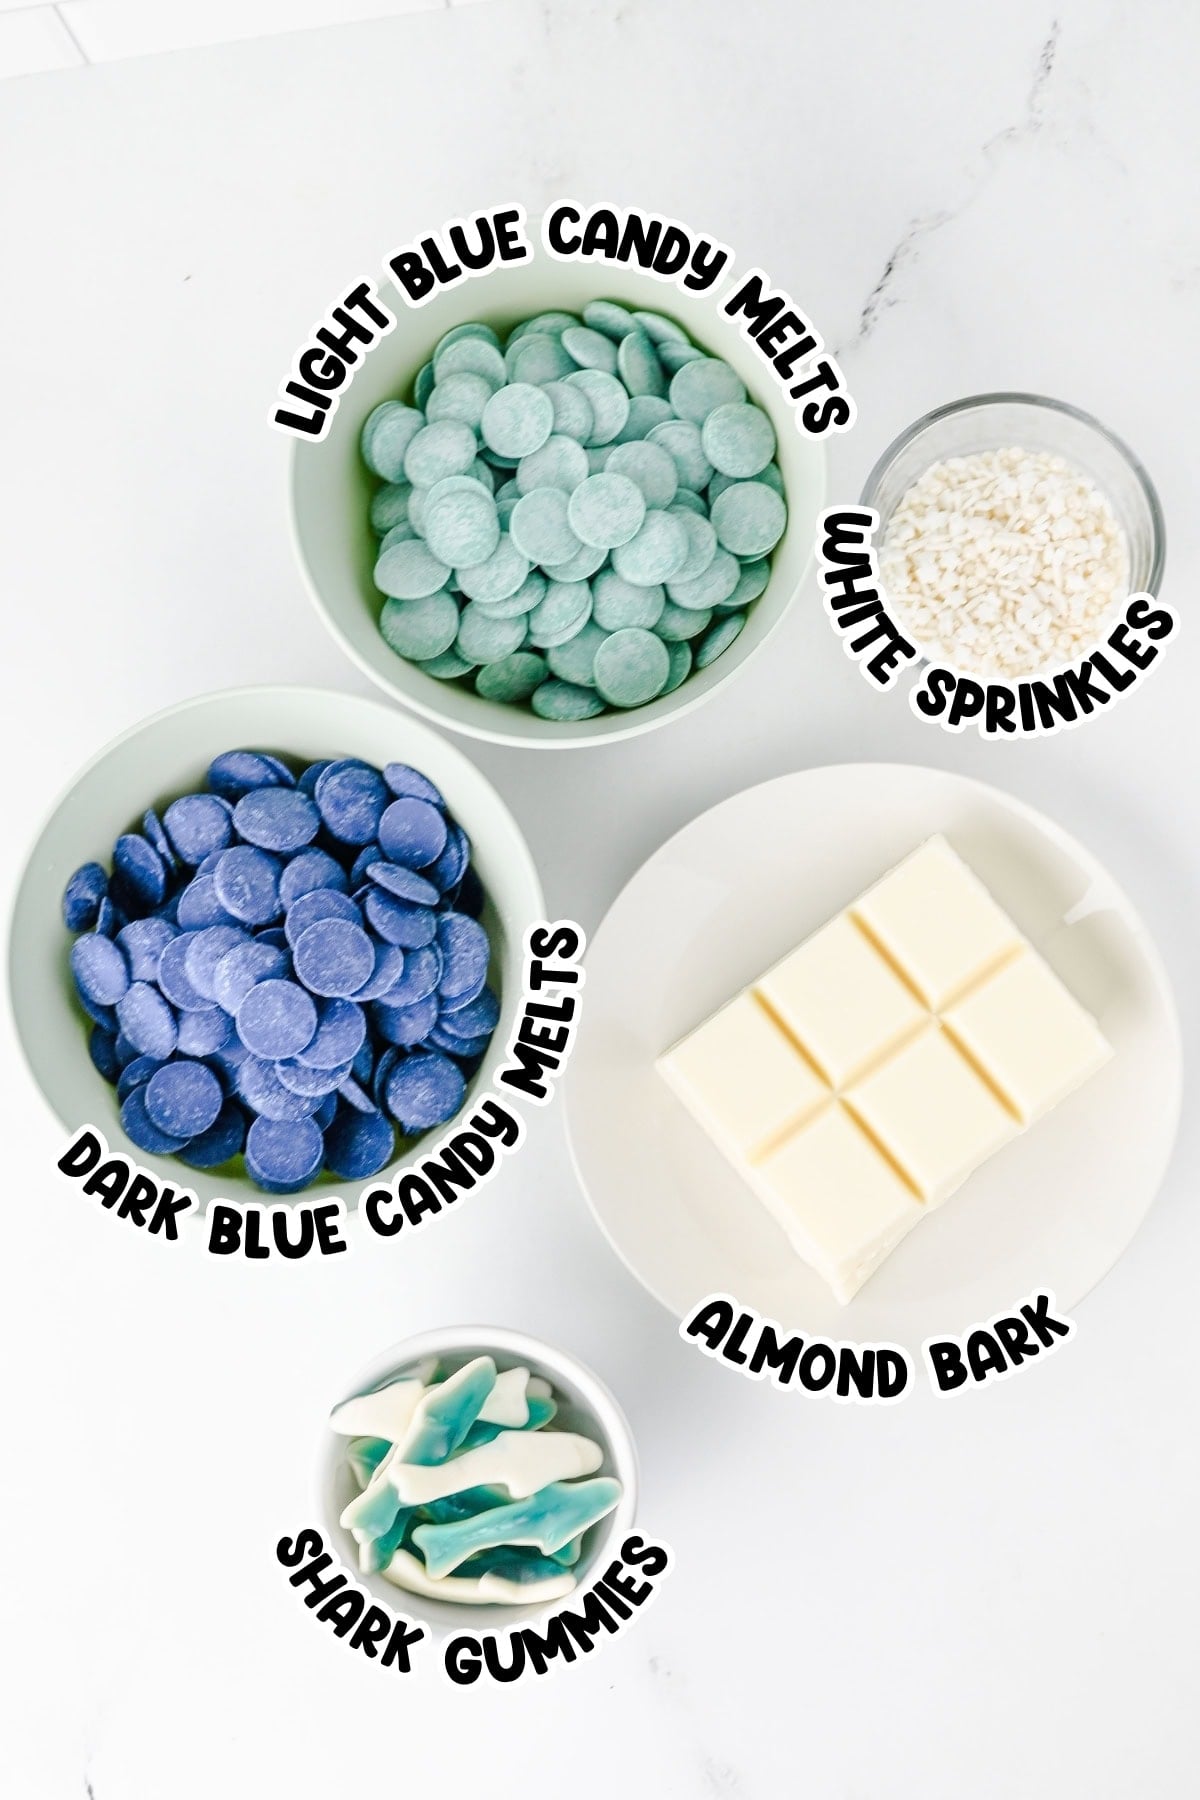
- Almond bark: Use white almond bark or vanilla candy coating for the white swirl. It melts smoothly and gives the bark a lighter base color.
- Dark blue candy melts: Add the deeper ocean-blue color in the swirled bark.
- Light blue candy melts: Create the pale blue sections and help the finished bark look more like the ocean.
- Shark gummies: Press onto the melted candy while it’s still soft so each piece of bark has shark shapes on top. Use the regular size ones, 1 ½ to 2 inches long. You can use smaller ones if you want more sharks per bark!
- White sprinkles: Use pearls, rods, stars, or shark-themed sprinkles for a little extra texture and color. These dolphin themed sprinkles have anchors and pearls, or you could use these sea green ones with shells and starfish. My favorite is these shark teeth sprinkles!
See the recipe card below for the full list of ingredients and exact measurements.
Substitutions and Variations
- Different gummies: Use fish gummies, whale gummies or ocean animal gummies if shark gummies are hard to find.
- More sprinkles: Try blue and white sanding sugar, pearl sprinkles or tiny star sprinkles.
- Candy color swap: Use teal, aqua or navy candy melts if you want more ocean shades in your shark bark recipe.
- White chocolate bark: You can use white chocolate melting wafers if almond bark isn’t available.
- Smaller pieces: Break the bark into bite-size chunks for party bowls or treat bags.
Blue Shark Bark Candy
Equipment
- Mixing Bowls Microwave-Safe
- Baking Sheet 18 x 13-Inch
- Whisk or Wooden Spoon
Ingredients
- 12 ounces almond bark
- 12 ounces candy melts light blue
- 12 ounces candy melts dark blue
- 8 to 10 shark gummies
- 1 tablespoon white sprinkles or shark themed
Instructions
- Add the almond bark to a microwave-safe bowl and each color of candy melts into their own bowl.
- Heat in 30-second increments until melted, stirring between each increment.
- Line a large rimmed baking sheet with wax paper or parchment paper.
- Drop spoonfuls of the melted candy and the almond bark onto the baking sheet.
- Swirl the candies around with a knife.
- Add the sprinkles and shark gummies, pressing down slightly.
- Let the candy set iat room temperature for about an hour or in the refrigerator if your kitchen is warm or you want it to set faster.
- Once set, break your shark bark candy into pieces and serve. Or, for party bag candy, pack a few pieces in clear bags with a shark sticker or sparkly blue ribbon.
Notes
- Dry bowls only: Dry the bowls fully before adding candy melts. Water can make melted coating seize.
- Spread before swirling: Spoon all 3 colors over the lined pan first, then swirl them together.
- Check gummy placement: Space the sharks across the pan so most broken pieces get at least 1 gummy.
Nutrition Information
Hungry for more?
Follow me on Pinterest and make sure to comment below!
Kim’s Top Tips
- Melt slowly: Heat the coatings in short bursts and stir well each time. Candy melts can scorch if they get too hot.
- Use separate bowls: Keep each color separate until spooning it onto the pan so the swirl doesn’t turn muddy.
- Swirl lightly: Drag a knife through the colors just a few times. Too much swirling blends the blues together.
- Add toppings quickly: Press on the shark gummies and sprinkles before the surface starts to firm.
- Line the pan: Parchment paper makes the bark easier to lift and break after chilling. Wax paper works too.
How to Store
- Storage: Store shark bark in an airtight container at cool room temperature for up to 1 week. Keep it away from heat and direct sunlight.
- Refrigerator: Refrigerate the bark for up to 2 weeks if your kitchen is warm. I recommend that you add parchment between layers so the pieces don’t stick together.
- Freezing: Freeze in a sealed freezer-safe container for up to 2 months. Thaw in the refrigerator before opening the container to reduce condensation.
- Make ahead: Make the bark 1 or 2 days before serving. The colors and shark gummies will still look fresh if the pieces are stored in a sealed container.
Serving Suggestions
Serve blue shark bark candy with Dirt Cups for a kids’ dessert spread with gummy worms and cookie crumbs. Red, White and Blue Snack Mix adds another colorful candy-style treat if you want bowls of grab-and-go snacks. These fun Crab Cookies are made with Oreos and also fit the seafood theme. And 4-ingredient Shark Week Snack Cups are too cute to resist!
Gummy Shark Candy Bark FAQs
Candy coating or melting wafers are easier because they melt thinner and firm better. White chocolate chips can work, but the texture may be thicker.
The swirl was probably mixed too many times. A few pulls with a knife are enough for the ocean pattern.
Yes, but breaking it by hand gives more natural bark pieces. Use a sharp knife if you want smaller, cleaner squares.