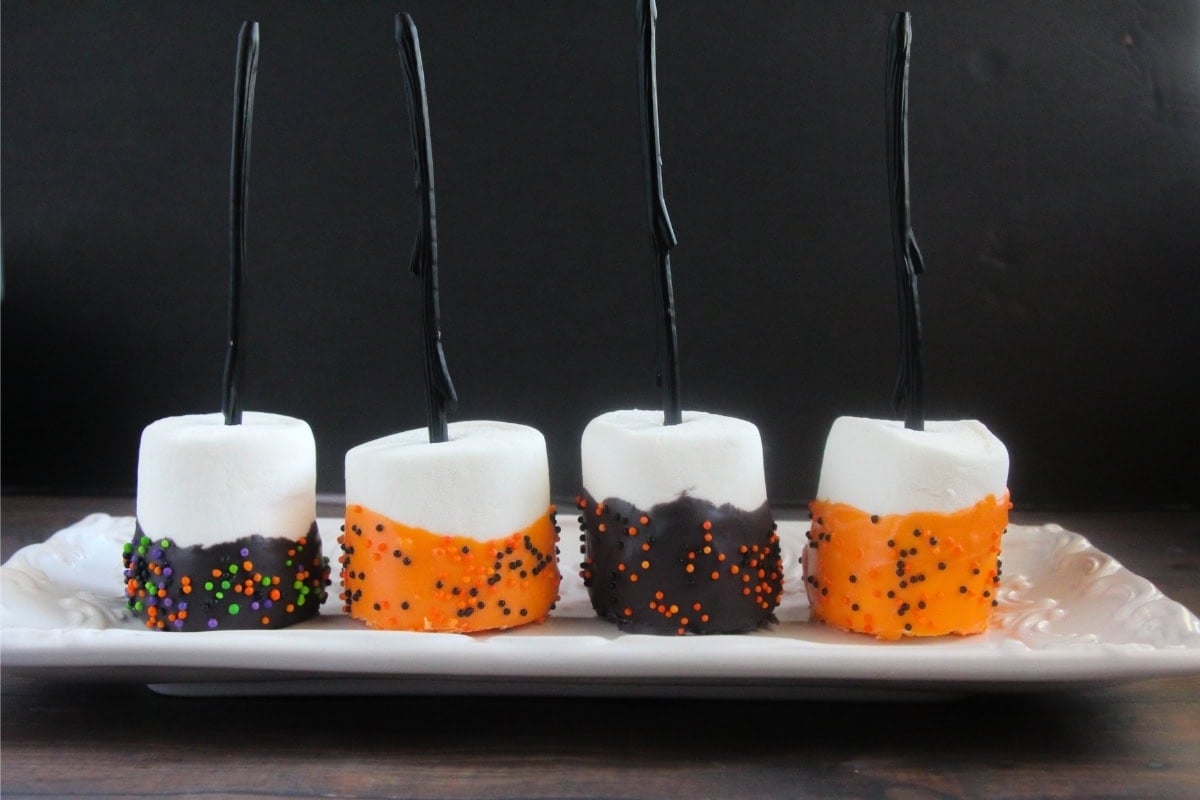
Easy Large Halloween Marshmallows Pops With Candy Melts
As we approach the holiday season, it’s time to start thinking about all the goodies you’re going to make for your Halloween Party! I know I’ve been! These Halloween Marshmallows are the fifth recipe in my Easy Halloween recipe series this year. and they do not disappoint.

I’ve been busy whipping up all kinds of quick go-to confections and Halloween sweets. So far, I’ve got sweet and salty candy pretzels; create your own jack-o-lantern cupcakes, eerie ghost cupcakes, and an adorable chocolate bat snack cake recipe that is ready in 5 minutes flat!
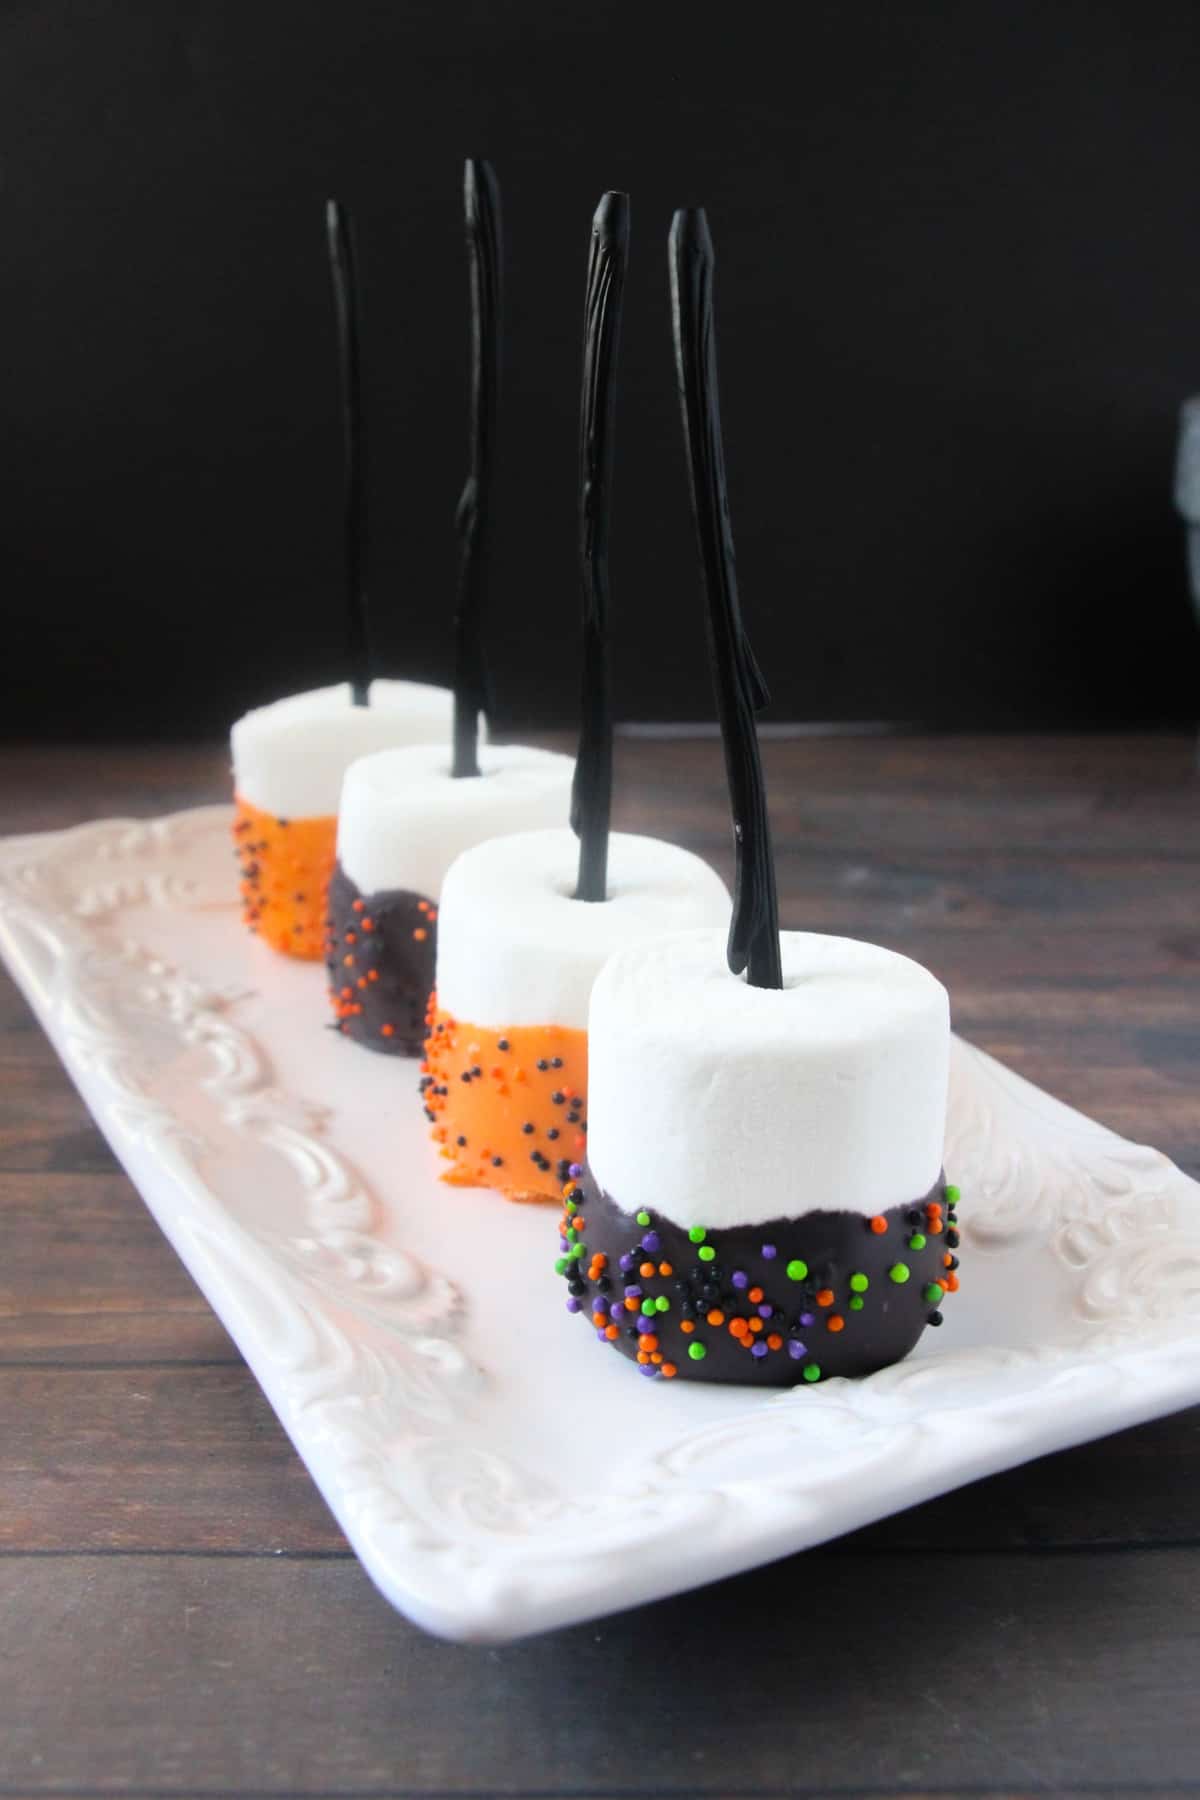
I really love these Halloween marshmallows pops because they are not only fun to make but are quick and taste delicious. With just a few simple ingredients, you can create these large easy Halloween marshmallow pops dipped in candy melts and covered in sprinkles. Another “selling” point for me is that they can be made in large batches, which is awesome for busy parents. They lend themselves well to storing and are perfect for making ahead for functions and a fun Halloween dessert.
The best part is it’s got all the mouth feels, soft and chewy marshmallow, and that oh-so-satisfying snap you get from biting into the candy coating finished off with the crunch of the sprinkles… just perfection! Combine that with the sugary sweetness that encompasses the feel of Halloween, and you have the ultimate party treat.
Table of Contents
What Are Halloween Marshmallow Pops?
Halloween Marshmallow Pops are delightful delicious treats that combine the soft, fluffy texture of marshmallows with the sweet, melty goodness of candy melts.
Decorated with colorful sprinkles, they are as visually appealing as they are delicious. These marshmallow pops are easy to make, requiring only a few basic ingredients and minimal time.
They are a fun and festive treat, perfect for Halloween parties or celebrations. This easy recipe allows for large quantities to be made at once, making it an ideal choice for those expecting a crowd. Their sweet flavor and satisfying textures, combined with their spooky aesthetics, encapsulate the spirit of Halloween in every bite.
These Halloween Marshmallows are…
- Easy to Prepare: The simplicity of this recipe is a big perk. With only a few basic ingredients and steps, anyone can make these festive marshmallow pops. It’s a great activity to get the kids involved in too!
- Great for Parties: These marshmallow pops are an excellent choice for Halloween parties. They not only add a festive look to your party table but are also easy to serve and eat.
- Delicious and Fun: The combination of soft marshmallows, sweet candy melts, and crunchy sprinkles is both tasty and fun. The different textures add an interesting element to each bite.
- Perfect for Gifting: Packaged in a cellophane bag and tied with a bow, these Halloween Marshmallow Pops make a perfect gift for friends, family, and neighbors.
Ingredients For Large Halloween Pops
- LARGE Marshmallows (“campfire size”): These are the base of our Halloween Marshmallow Pops. The large size makes them perfect for dipping and decorating, and their soft, fluffy texture provides a delightful contrast to the candy coating.
- Black candy melts: These create a smooth, glossy finish on our marshmallow pops, adding a visually appealing and tasty outer layer. The melted dark chocolate color is perfect for Halloween-themed treats.
- Orange candy melts: Just like the black candy melts, these provide a fantastic taste and texture but with a festive orange hue that’s just right for capturing the essence of Halloween.
- Shortening: This ingredient is key to achieving a thin, even coating of the candy melts on our marshmallow pops. It helps the candy melt smoothly and evenly, preventing clumps and ensuring a professional-looking finish.
- Halloween sprinkles: The final touch! These are not only fun and festive, but they also add a delightful crunch that contrasts beautifully with the soft marshmallows and the snap of the candy coating. Choose a mix that captures the spirit of Halloween – think black cats, pumpkins, and bats!
See the recipe card below for a complete list of ingredients and measurements.
Substitutions And Variations
- Marshmallow Alternatives: If you’re not a fan of regular marshmallows, feel free to use flavored marshmallows. Strawberry or raspberry marshmallows can add a fun twist to the recipe.
- Candy Melts Alternatives: If you can’t find candy melts, you can color melted white chocolate as a substitute . Use food coloring to achieve the desired Halloween colors.
- Candy Melts Color Alternatives: If looking for some different ways to bring color to Halloween, then try Green candy melts for monsters, White candy melts for ghastly ghosts, and purple candy melts will add a bit of deep rich Halloween color to these spooky desserts
- Shortening Substitute: If you prefer not to use shortening, you can opt for coconut oil. This will also give your candy melts a smooth and glossy finish.
- Sprinkle Variations: Feel free to get creative with your choice of sprinkles. You can find sprinkles shaped like ghosts, witches, and even spider webs for an extra spooky touch!
- Add-Ons: For some extra crunch, consider adding crushed cookies or nuts to the mix. Dip the candy-coated marshmallows in the crushed cookies or nuts immediately after coating them for best results.
How To Make Edible Dead Tree Pop Sticks
If you prefer to use edible cake pop sticks Pocky Sticks work great! To get the dead tree look that I have here, you will want to dip your Pocky Stick in the black candy melts. Let the excess drain off and dry. The coating does not need to be smooth; in fact, the more gnarled looking, the better.
After you have dipped all your sticks for the first initial coating, you’ll want to let the candy melts cool until you can dribble it without the excess running off.
Take a spoon and get some of the cooled candy melts. Hold your Pocky Stick straight up and down, drip the black candy meltdown one side, and let it “glob” together and dry. Repeat that on the other side of your Pocky Stick for a broken black tree limb look!
How To Make Large Halloween Marshmallows
- Prepare a baking tray with a piece of parchment paper for the marshmallows to dry on.
- Place 1 cup of candy melts plus 1 Tablespoon shortening in a microwave-safe bowl.
- Heat for 25 seconds, stir and then reheat. Continue until the candy melts are completely smooth and liquid. (Photo 1)
- While the candy melts are heating, insert skewers into the marshmallows. (Photo 2)

- Dip the top of the marshmallow into the melted candy and allow the excess candy to drip off. (Photo 3)
- Sprinkle on your choice of candy sprinkles, and set to dry on your prepared cookie sheet. (Photo 4)
- Repeat with 5 more marshmallows in the same candy color, then repeat with the remaining 6 marshmallows in the other candy melt color.

Expert Tips
- Don’t Rush the Drying Time: Patience is key when making these marshmallow treats. Allow enough time for the candy coating to dry completely before serving or packaging them. Attempting to serve or package them too soon could result in a mess.
- Use Quality Sprinkles: Not all sprinkles are created equal. Higher quality sprinkles will not bleed their color onto your candy coating and will hold their shape better.
- Customize Your Color Scheme: While black and orange are traditional Halloween colors, don’t be afraid to get creative with your color choices. Green or purple sprinkles could be fun alternative options or even a spooky white!
- Keep it Clean: Candy melts can be messy. Keep a clean, damp cloth nearby to clean up any drips or spills quickly.
Storing Tips
If you find yourself with leftover Halloween Marshmallow Pops, fear not! They are easy to store and can be enjoyed later. Place the pops in an airtight container, ensuring they’re not touching each other to avoid sticking. If you need to stack them, simply separate layers with wax or parchment paper. Store the container in a cool, dry place away from direct sunlight. Avoid storing in the refrigerator as the moisture can cause the candy coating to weep.
These perfect treats can last up to 1 week when stored properly. It’s important to note that refrigeration is not recommended, as the humidity can cause the candy coating to sweat and become sticky.
What To Serve With Halloween Marshmallows
These Halloween Marshmallow Pops make the perfect festive fun treat on their own, but they can also be paired with other Halloween-themed snacks for a complete and spooky spread. Consider serving them alongside a witches’ brew punch, ghost-shaped cheese and crackers, spooky Halloween Oreo Cake Bars, and Mummy Jalapeno Poppers.
If you’re hosting a dessert party, complement these pops with ghost cupcakes, meringue bones, and a Halloween Bundt Cake.
For a fun touch, you could arrange the marshmallow pops in a centerpiece display or ‘graveyard’, encouraging guests to ‘pick their poison’.

Recipe FAQs
You do not have to use candy melts. But if you want to get Halloween colors like orange, green, and red, you’ll need to use food dye with white chocolate. Note that food dyes can change the taste of chocolate (or anything it’s put in, for that matter); make sure you taste test it before you dip your marshmallows in it.
If you prefer to cover the marshmallows from top to bottom, you can. Keep in mind this will increase the overall sweetness, but at this point, it’s already a marshmallow covered in candy and sprinkles… I say go for it!
You sure can! In fact, a white chocolate-dipped pumpkin spice marshmallow sounds like Halloween and Fall in one bite!
More Halloween Recipes You’ll Enjoy
Or any other delicious recipes on my site? If so, please leave a ★★★★★ star rating below and a 📝 comment sharing your thoughts!
To ensure you’re not missing a thing. Subscribe to my newsletter and follow along below!

Halloween Marshmallows Pops
Ingredients
- 12 LARGE Marshmallows “campfire size”
- 1 cup (226 g) black candy melts
- 1 cup (226 g) orange candy melts
- 2 Tablespoons shortening
- Halloween sprinkles
- 12 Popsicle sticks straws, or wooden skewers
Instructions
- Line a baking sheet with parchment paper for the marshmallows to dry on.
- Place 1 cup of candy melts plus 1 Tablespoon shortening in a microwave-safe bowl.1 cup black candy melts,2 Tablespoons shortening
- Heat for 25 seconds, stir and then reheat. Continue until the candy melts are completely smooth and liquid.1 cup orange candy melts
- 12 LARGE Marshmallows,12 Popsicle sticks
- Dip half of a marshmallow into the melted candy and allow excess candy to drip off.
- Sprinkle on your choice of sprinkles, and set to dry on your prepared baking sheet.Halloween sprinkles
- Repeat with 5 more marshmallows in the same candy color, then repeat with the remaining 6 marshmallows in the other candy melt color.
Notes
- Don’t Rush the Drying Time: Patience is key when making these marshmallow treats. Allow enough time for the candy coating to dry completely before serving or packaging them. Attempting to serve or package them too soon could result in a mess.
- Use Quality Sprinkles: Not all sprinkles are created equal. Higher quality sprinkles will not bleed their color onto your candy coating and will hold their shape better.
- Customize Your Color Scheme: While black and orange are traditional Halloween colors, don’t be afraid to get creative with your color choices. Green or purple sprinkles could be fun alternative options or even a spooky white!
- Keep it Clean: Candy melts can be messy. Keep a clean, damp cloth nearby to clean up any drips or spills quickly.
Nutrition Information
Hungry for more?
Follow me on Pinterest and make sure to comment below!


